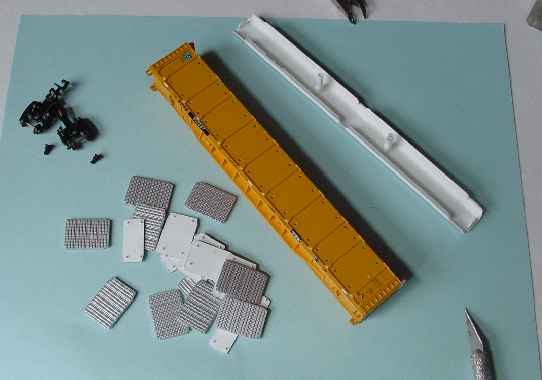
Detailing a ConCor autorack with a set of Plano Model Products stainless steel autorack panels.
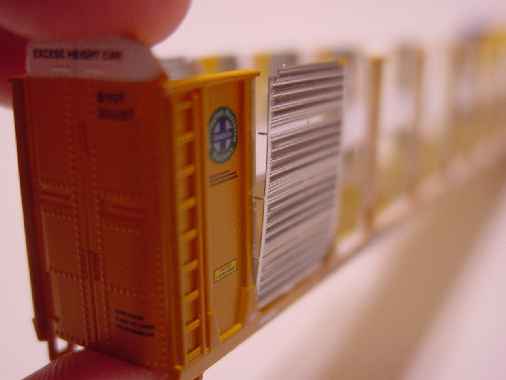
Converting a Concor autorack model to a see through models is a relatively easy process that can be done in an evening or two. The following information shows how I converted a prepainted model to a ready to run model, complete with see through panels, a mid floor and a couple autos.>
| How to photos | How to discription |
|---|---|
 |
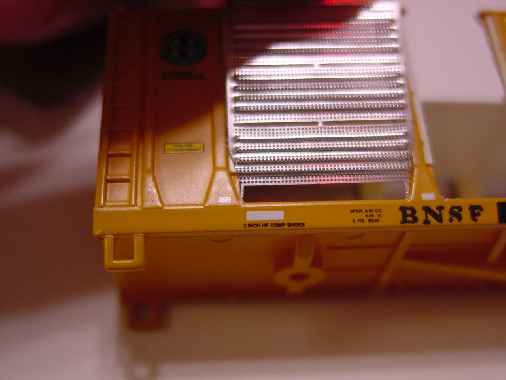
Here is what a ConCor Bi-Level autorack looks like out of the box. Just the way all plastic autorack models have looked for years. |
 |
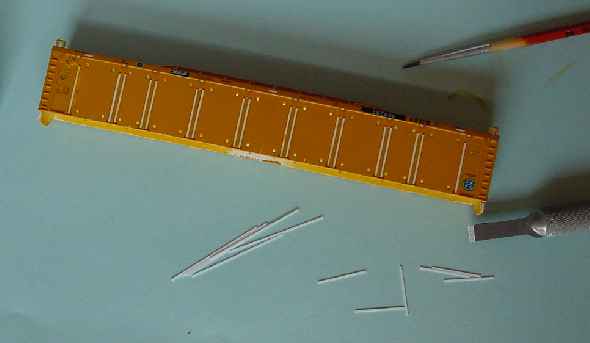
A close up of the ConCor panels should you not know what they look like. |
 |
Begin the detail process by disassembling the model. Of all the cars I have started working on, none of them have been glued together in any way. These really are 'Snap Together' models. So, remove the roof. |
 |
Using a X-acto blade or even a small screwdriver blade, pop the plastic side panels off. Each panel is held in place with four pegs pressed into four tight fitting holes. Very little force is needed to pry the panels off. |
 |
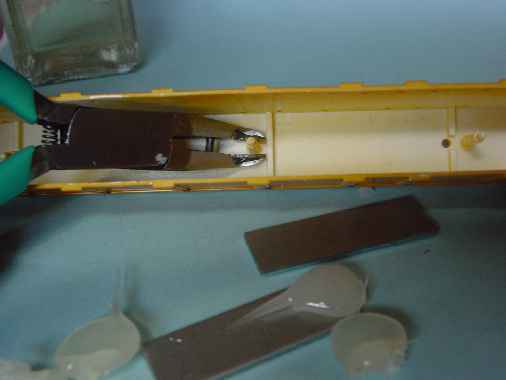
You might as well remove the trucks now. Your model should be completely disassembled now. |
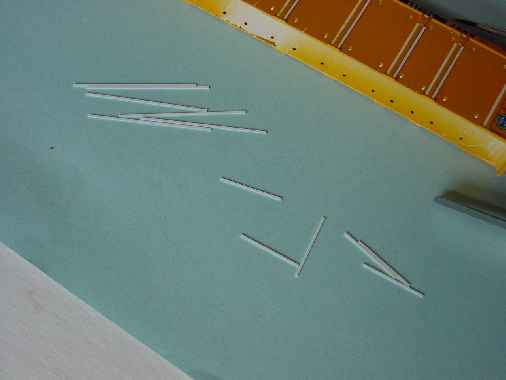 |
Included with all of the stainless steel panel sets and kits are .015 X .030 X 1.5" styrene strips. These strips of styrene are used to bring the panels out even with the edge of the post, just like the prototype cars. Each of these strips will need to be cut in half, creating .75" (3/4") strips. |
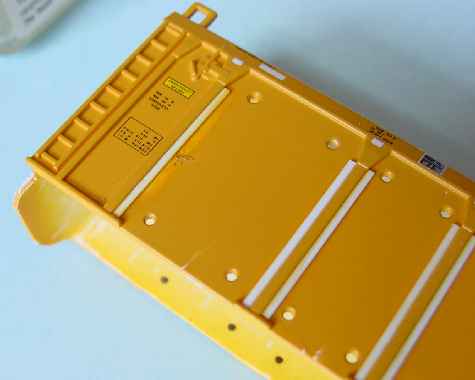 |
These .75" strips will now be glued to each side of the side posts. Liquid cement can be used to cement these strips in place but use caution as too much liquid cement can soften and thin the paint as seen here (far left). Inside the panel area is not a problem, but on the posts will be seen once complete. |
 |
Add the strips to all panel sides of all posts. ** Consider drilling panel side mounting holes here - see a little farther down. |
 |
Moving to the inside of the car, remove the metal weights. Of the cars I have in work, all had the weights held in place with dabs of scilicon. Carefully pry the scilicon loose and the weights will come right out. |
 |
Also remove the two roof mount posts and injection sprue if there is one. |
 |
The interior should now be free of all obsticals. There are four ribs on the floor of the car that hold the weights in place. These can be removed, now , later or not at all. As you will see, they do have an affect on the car sides modification. |
 |
With all the new styrene strips applied and the inside cleared out, it is time to open the sides up to make the car see through. In the photo to the left, you can see a pair of Tin Snips. These snips can be found at any hardware store and are used for cutting sheet metal. I found they do a great job of cutting unwanted plastic. |
 |
At this point, the first thing I did was to use a sharp blade to make some score lines at the bottom of each panel indention. You can see the score lines at the bottom of each panel location. The scores do not need to go all the way through the side, just make a break line. Then use the tin snips, cut down each side of the side posts. Be careful not to cut the "top bars" at the top of the side posts. |
 |
You will notice that as you get a cut on each side of the panel recess, the old side section will bend in or out. If your cut goes all the way to the score line, you should be able to break the sections out between each set of side posts. |
 |
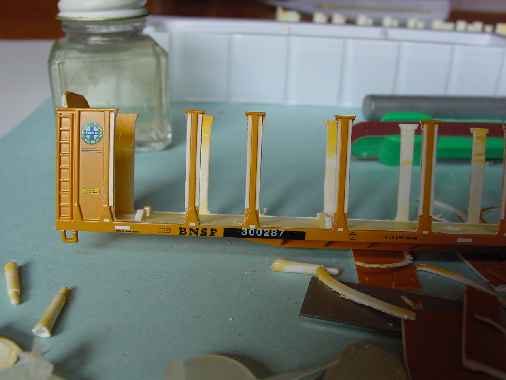
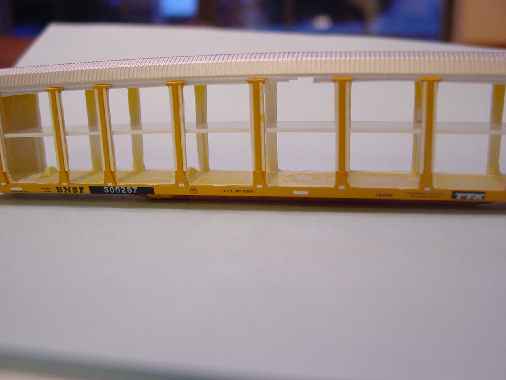
Here is the car with all the recessed areas removed and ready for the "fine trimming". |
 |
When I cut the sides out, I left a small amount of material next to each piece of added styrene. This was done so I could trim upto it. I didn't want to cut it too close in the initial cut with the tin snips. They are too bulky and could risk cutting the styrene strips. Also notice one of those weight strips on the floor. The all come to the edge in a panel area. A little extra work is required here to get the extra plastic removed. There is another area shown in the third opening, lower right corner. |
 |
To do the trimming, I use a small set of nippers that have a 45 degree turn in the cutting edges. Carefully trim any excess plastic up to the styrene strips. |
 |
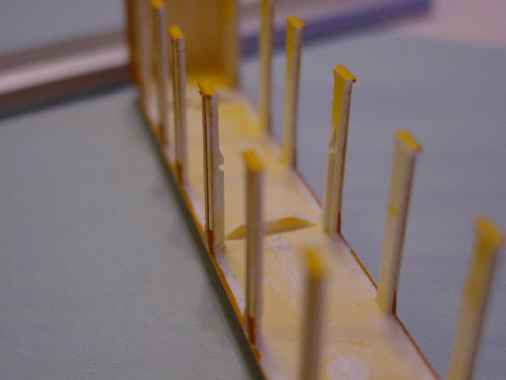
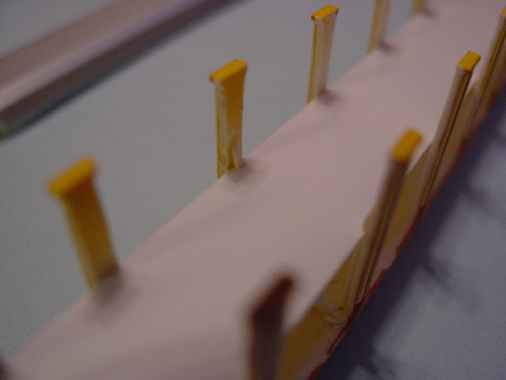
Posts after trimming. |
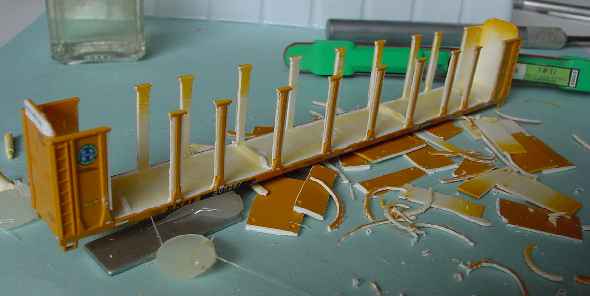 |
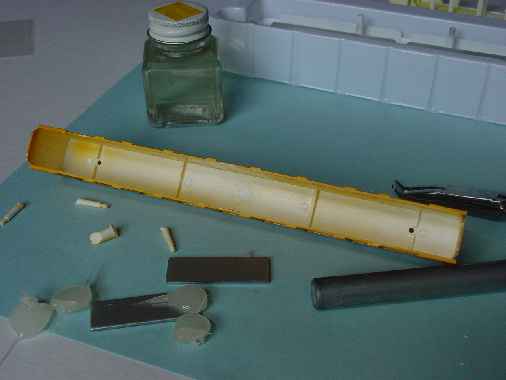
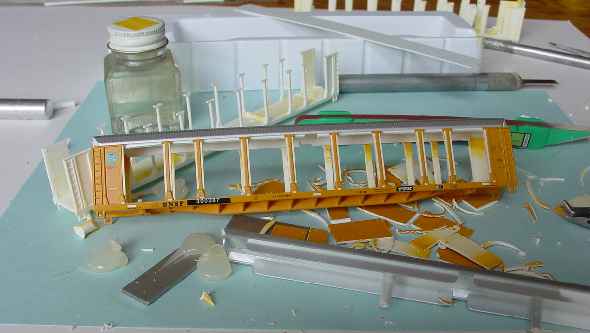
The whole car and mess. |
 |
Now that the car is going to be see through, you are going to need a second floor. Remember, the end doors are Bi-level doors so only one more floor is needed. My method for holding the floor in place is to add pieces of .040 X .040 X .450" styrene glued to the side of a few side posts. About four on each side. Assuming one would want the option of removing the floor to add / remove autos, I added small triangular pieces of styrene above a couple of the floor supports. Easy to pop the floor in but will keep it from popping out. |
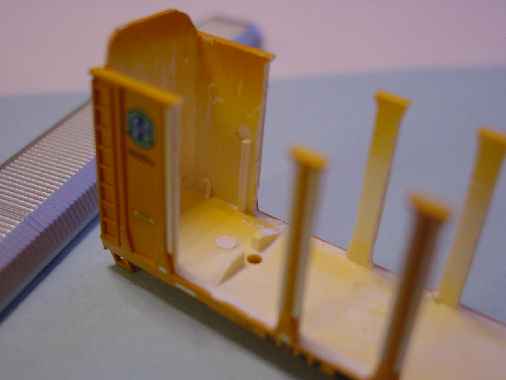 |
End floor support. |
 |
The roof will need to be modified. There are side "retainer walls" sticking down from the roof that help hold it in place. These "retainer walls" would block part of the see-through affect if not modified. Trim each of these "retainer walls" to create a .050" lip to hold the roof in place. An untrimmed roof can be seen in front of the model. |
 |
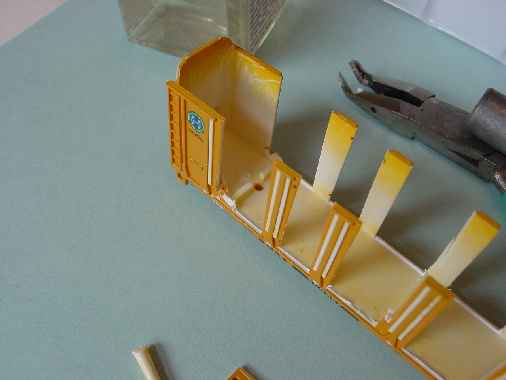
Notice how the roof lip (that "retainer wall")just barely sticks inside the car. I guess you noticed the car being used to prop this car up. I stripped the paint using 91% rubbing alcohol, modified the sides and removed the end doors. I will be painting it up and adding panels to represent an 80's style autorack. More on that as time allows... |
 |
Here is a view of the floor installed in place. I used .020" thick styrene, .6" wide and (the length of the car) for the floor. The triangular pieces can be seen here. |
 |
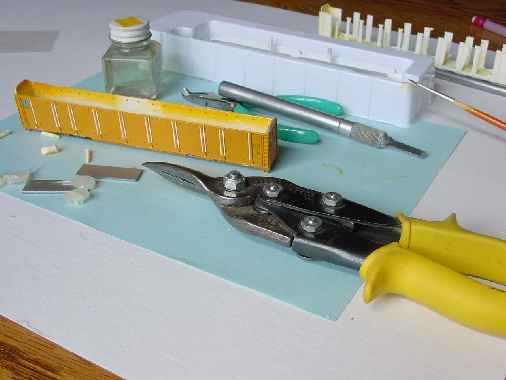
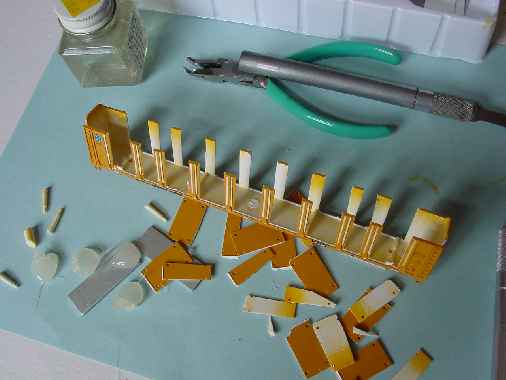
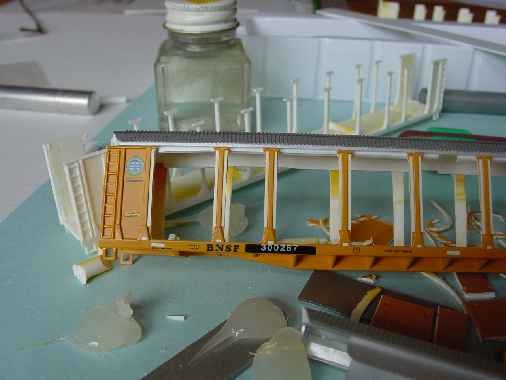
Here is the modified car with a second floor installed. Time for the new Stainless steel panels. I didn't keep a close record but to this point, I have spent around two hours on the modification to this point. |
 |
A full view of the modified car. The bow in the car is from the camera - (I am not a photographer.) |
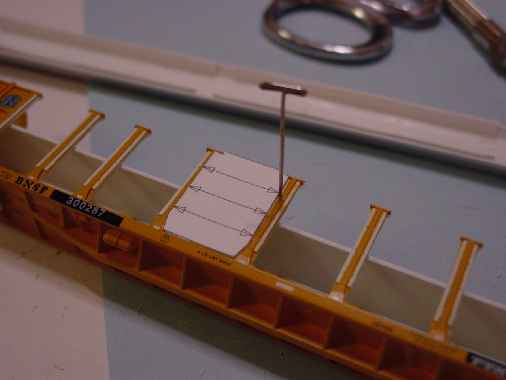 |
**Yep, I got in a hurry! This step should have been done once the styrene strips were added and before
cutting the sides out. Anyway, using the supplied paper templates, mark and drill #78 holes to hold the panels in place. There are six per panel.
This is the part that takes the most time. Yea, it takes a while to drill all these holes, but they are needed if you want to insure the panels stay on! A suggestion on the templates. Rather than mess with the paper templates, attach them to a piece of .010" styrene, cut the styrene to match the paper template, mark for holes and use the more ridge styrene templates. |
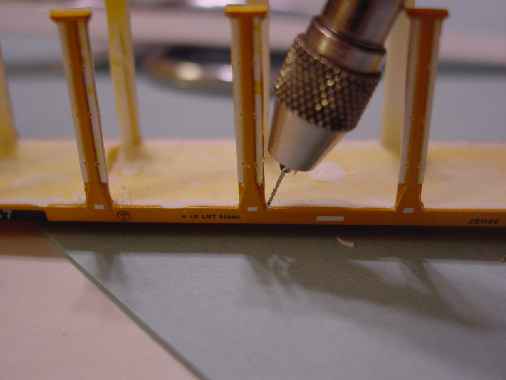 |
Also drill a hole in the each corner of the post and the floor. These should be straight down, I just placed the drill here to show where I was talking about. |
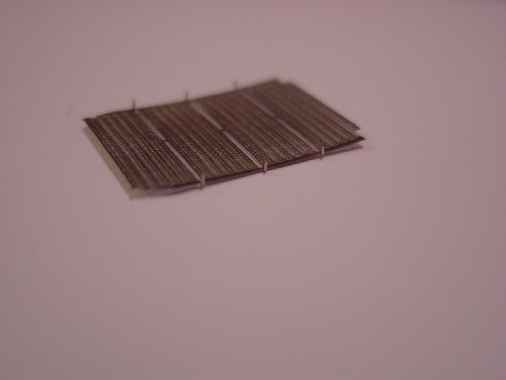 |
Seen here is one of the panels with the side pins bent up 90 degrees. These pins go into the drilled holes and help hold the panels in place. You don't have to use these pins but it is highly suggested. The two pins on the bottom of the panels help hold the bottom in place. |
 |
Insert bottom pins in holes. |
 |
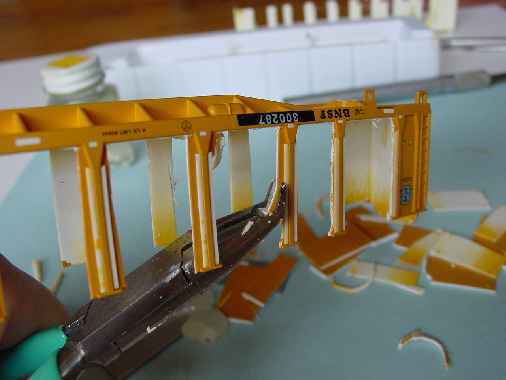
And side pins in drilled holes and CA in place. Add all planels. |
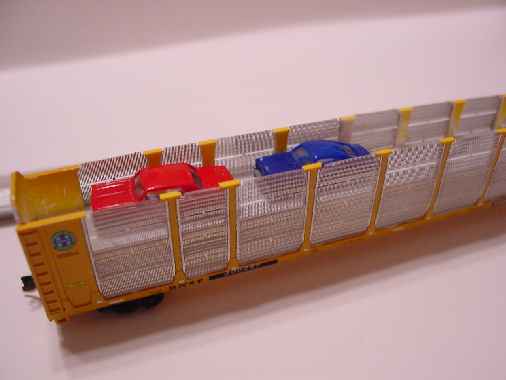 |
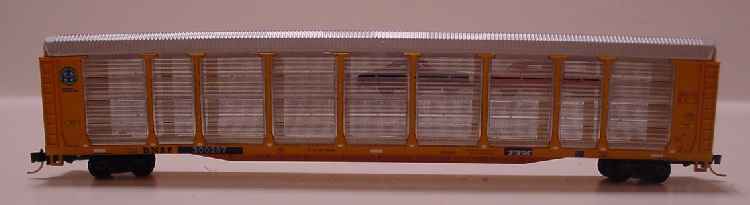
View of completed car before adding the roof. A couple autos have been placed in it just so you can see the effect of the open panels on the car. |
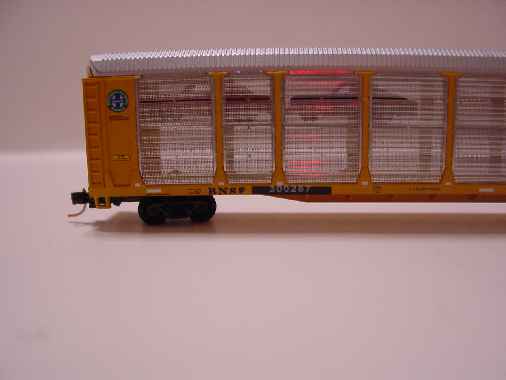 |
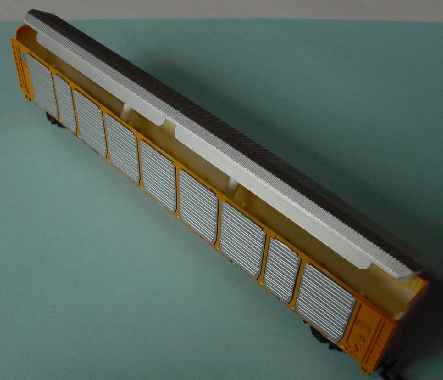
Roof added and still see-through! |
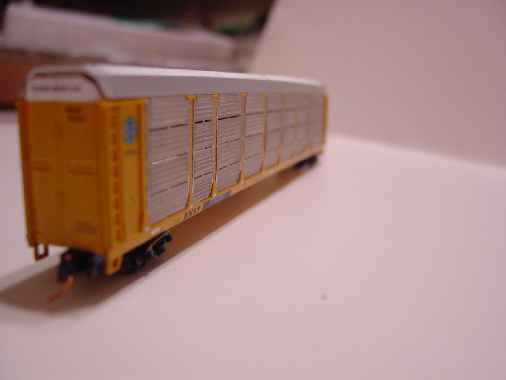 |
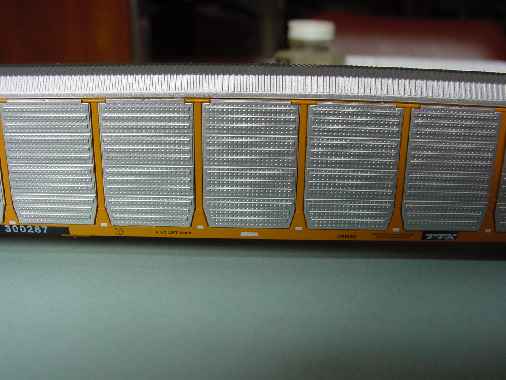
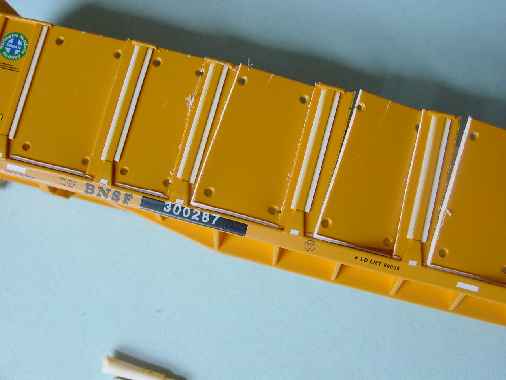
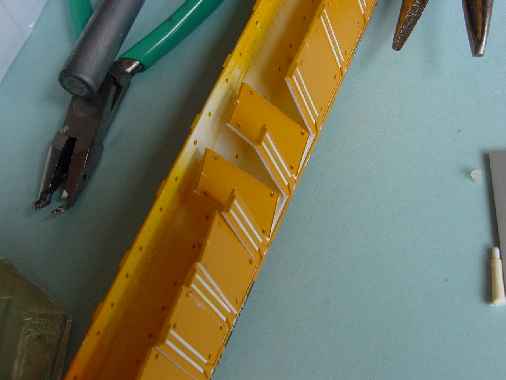
Side angle view showing true prototype corrugations. Also notice how the panels sit flush with the posts, |
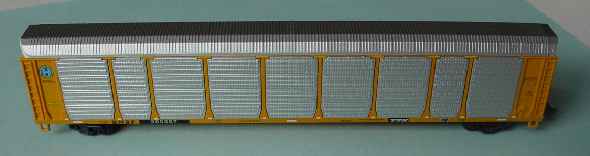
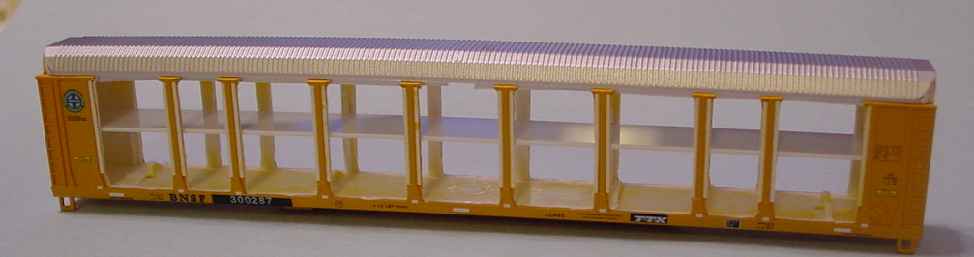
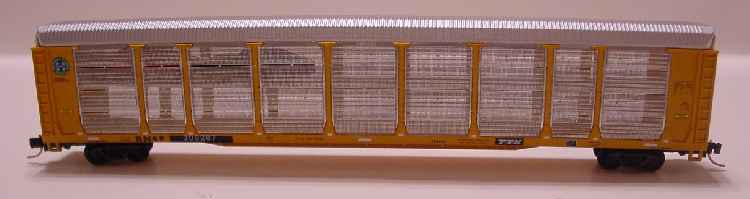 Full view of car. |
 Other side. I hope this shows that it really isn't that hard to detail one of these autoracks. If you already have one or more of the cars, they can be made to look as good as todays models. And you can say you "Detailed it yourself"! And although this car has the "standard" configuration panels (all panels are perforated), I have many other panel configuration available. Check out the options. |
| Home Page | N scale autoracks page | Whats New |