CNW SD18 Detailing project - Atlas model
Updates are added to the bottom of the page.
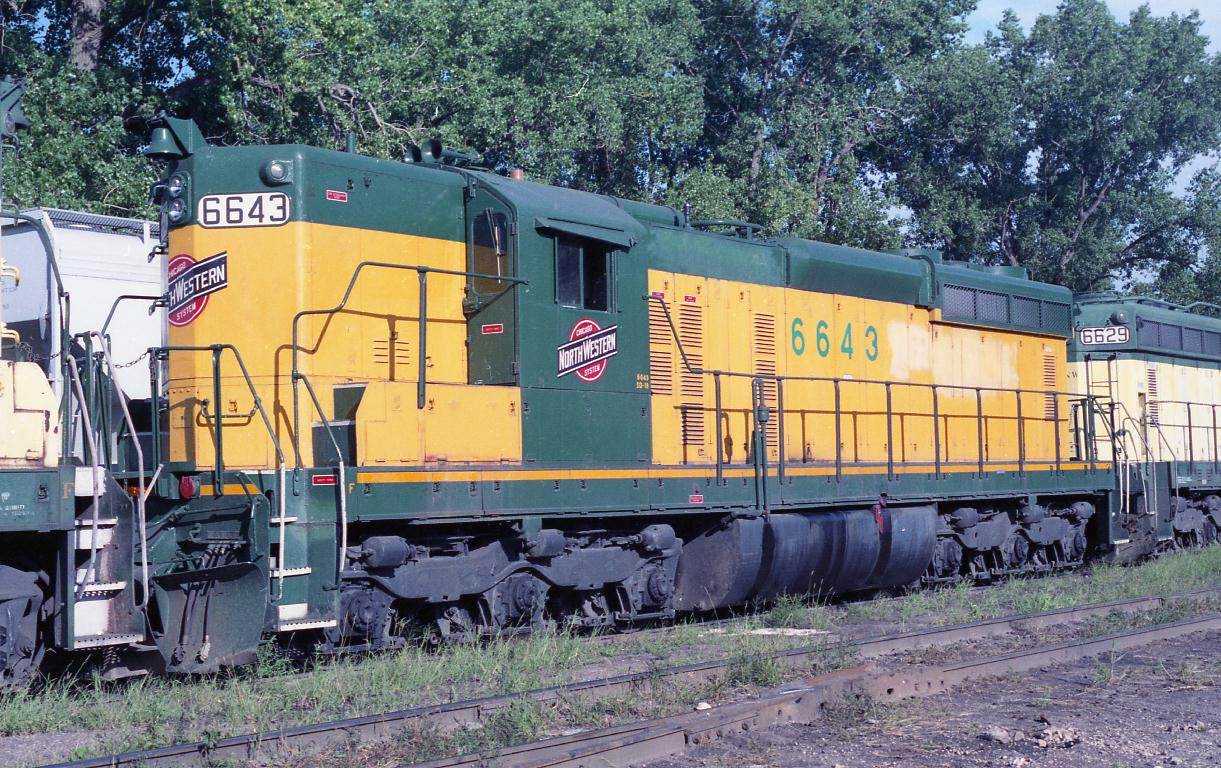
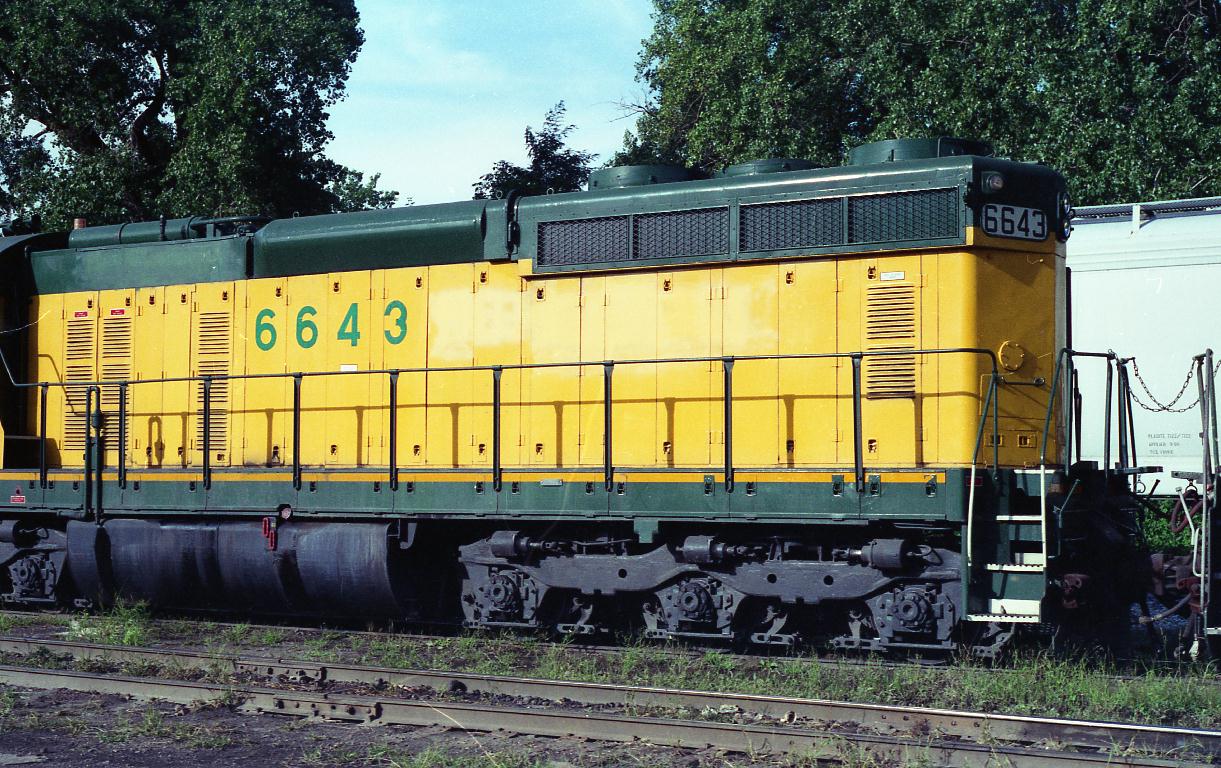
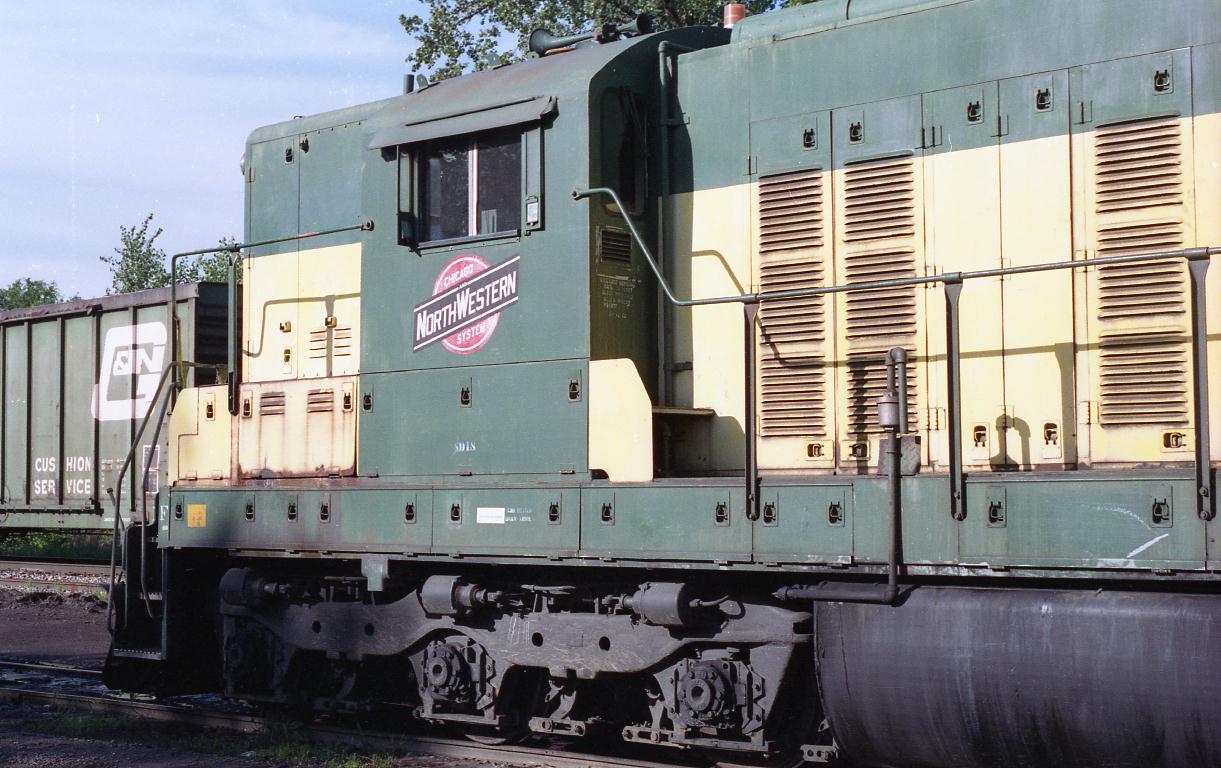
CNW SD18 #6643 by Nathan Dahms.
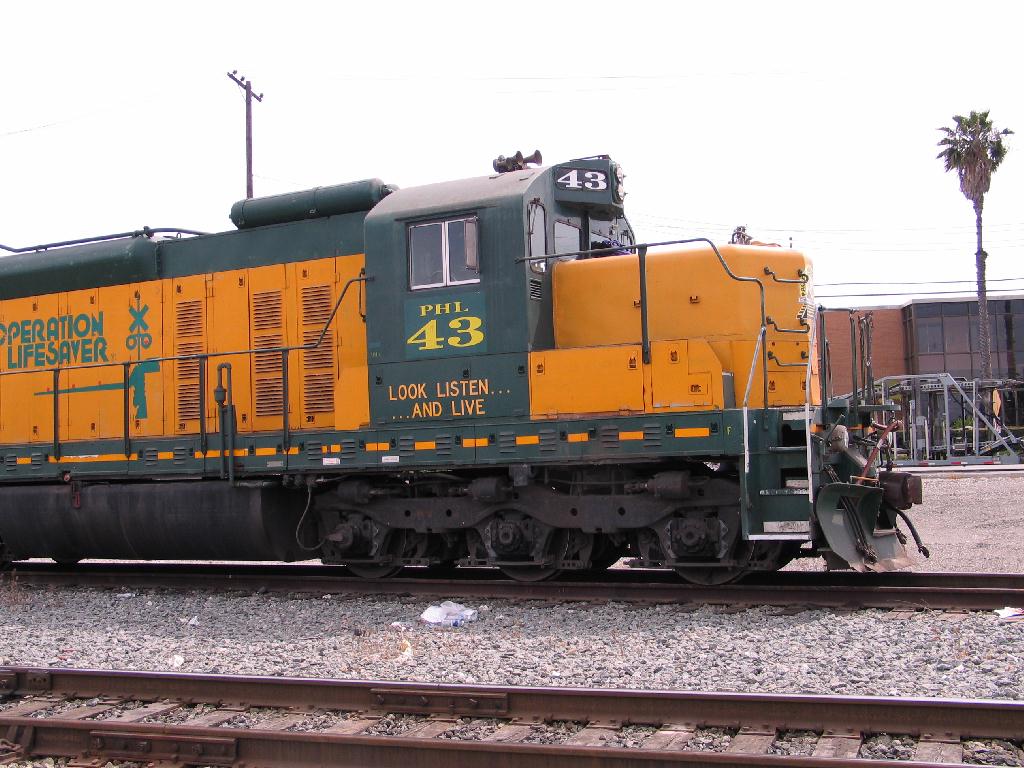
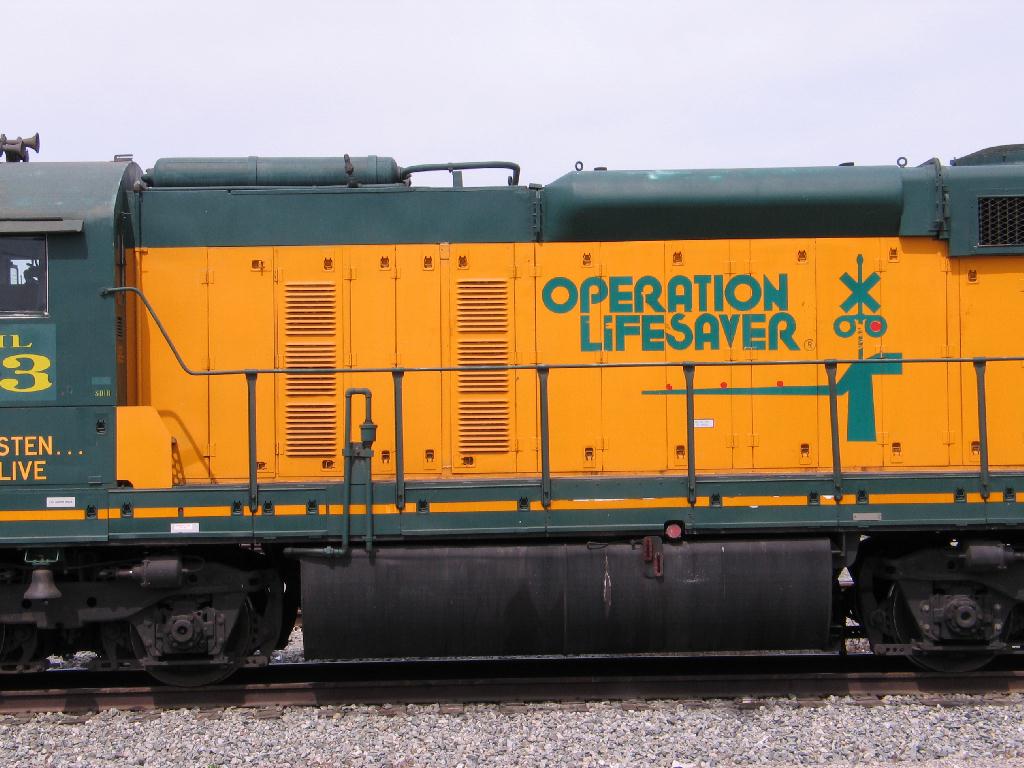

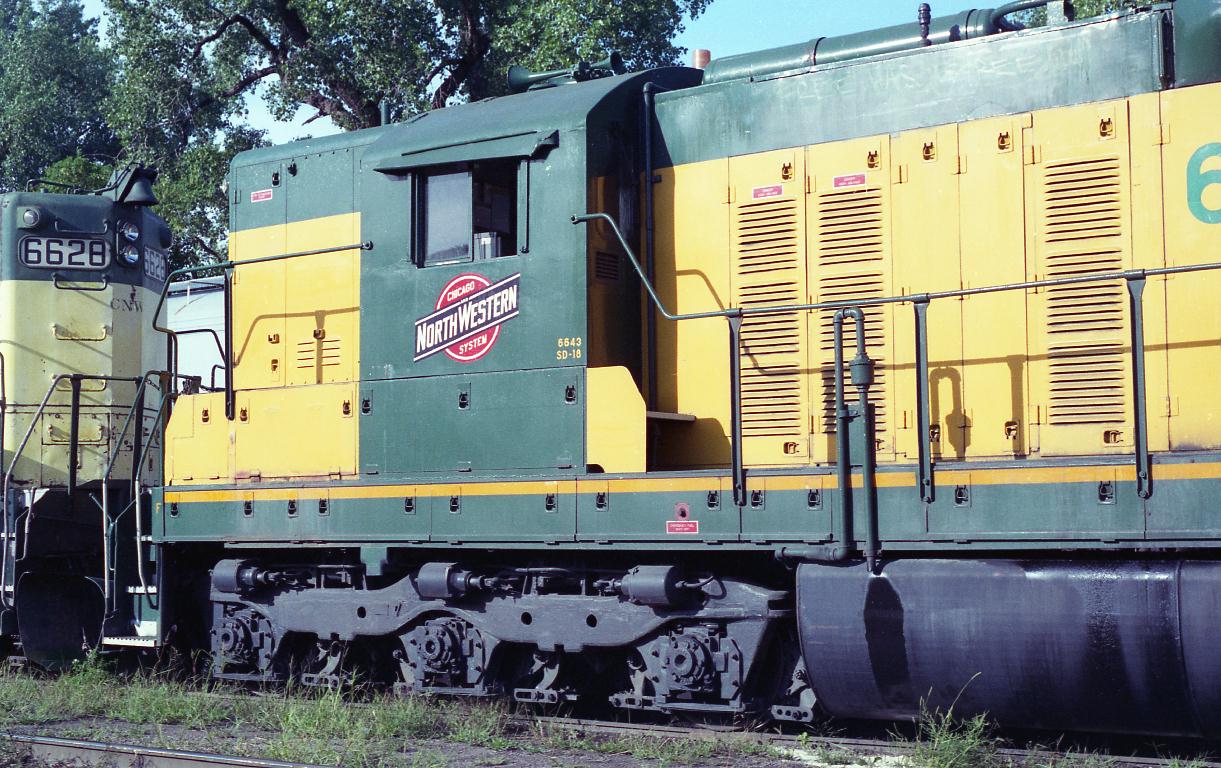
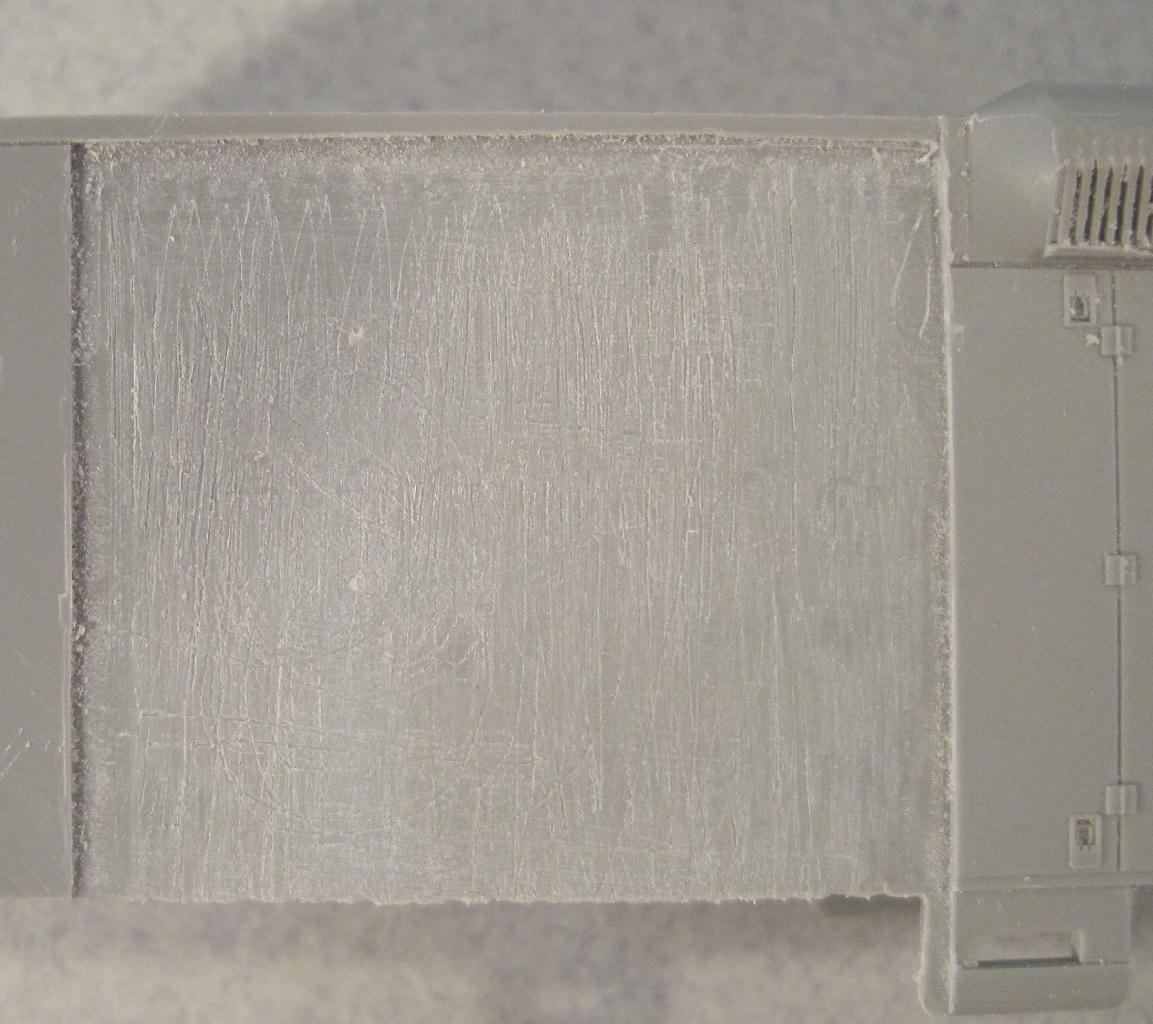
Views of the Atlas model in SD24 form. The turbo duct and doors will need to be removed.


A few things I struggled with while developing these parts and some things I am still concidering.
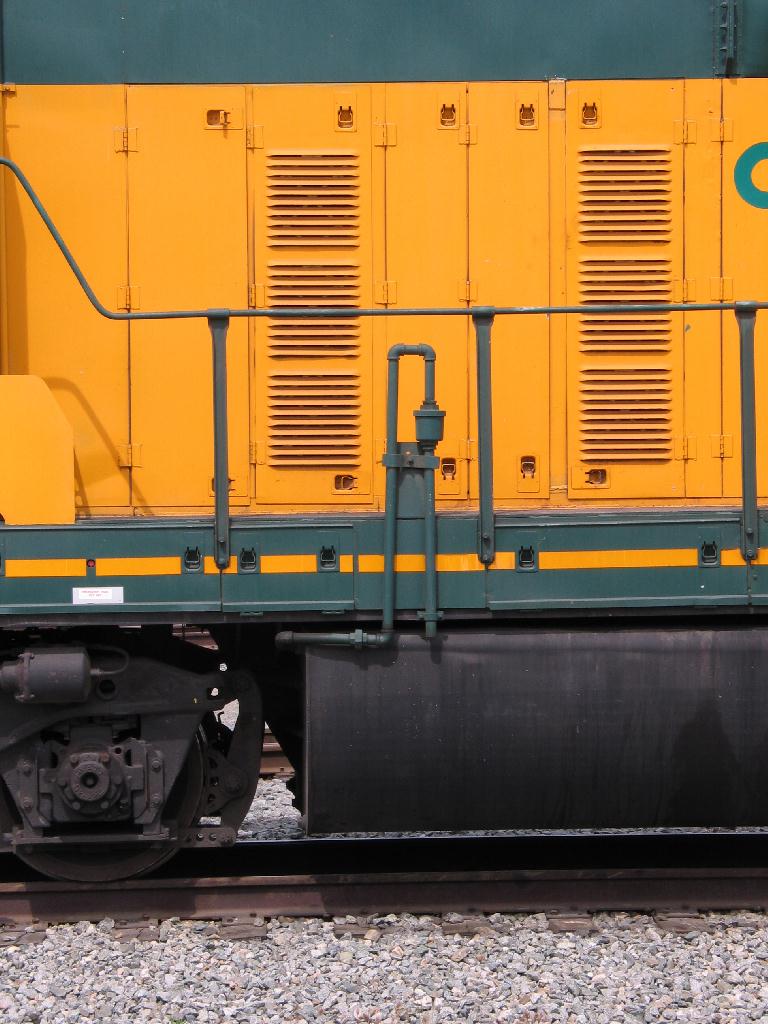
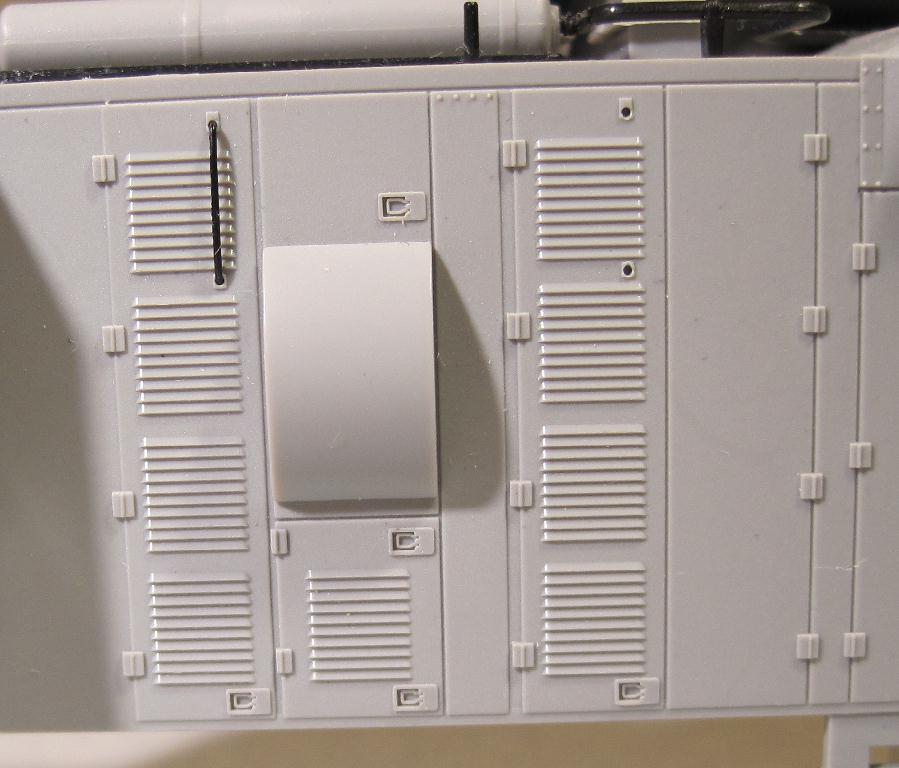
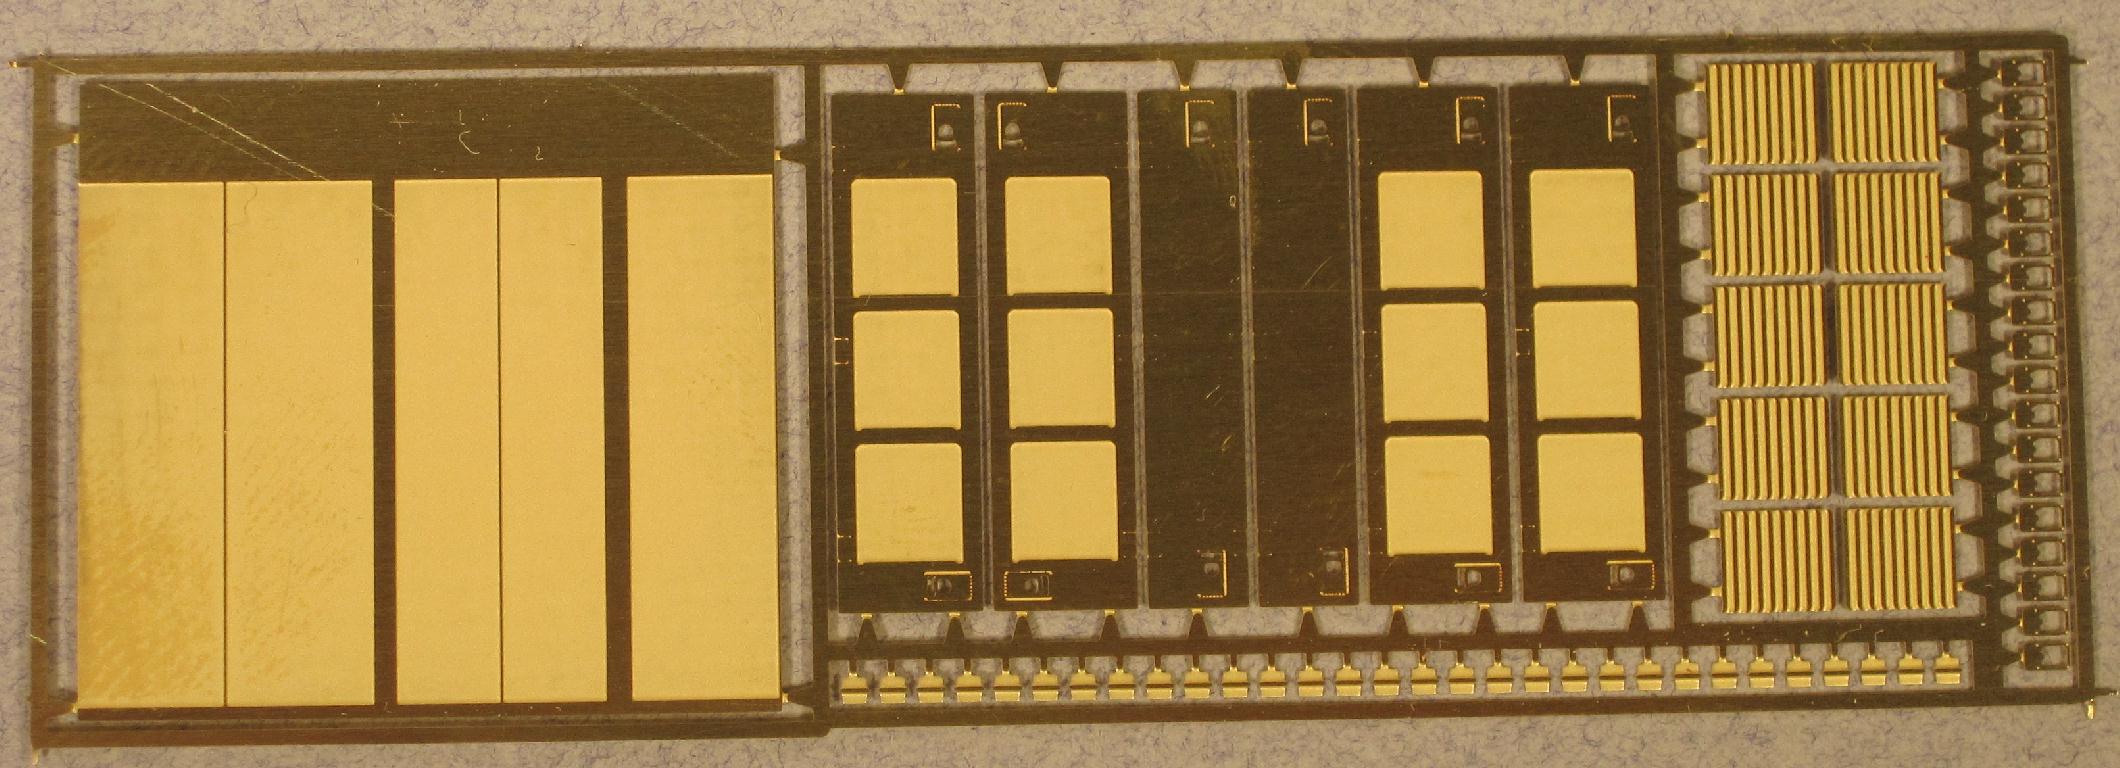
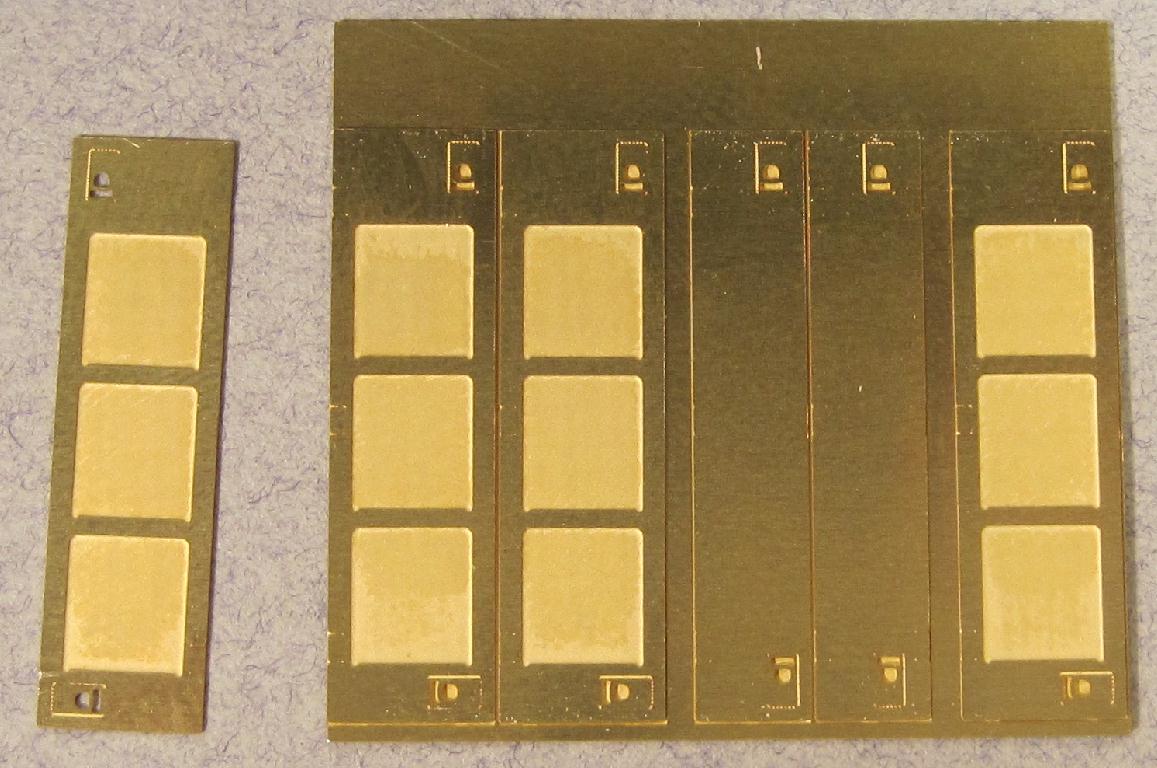
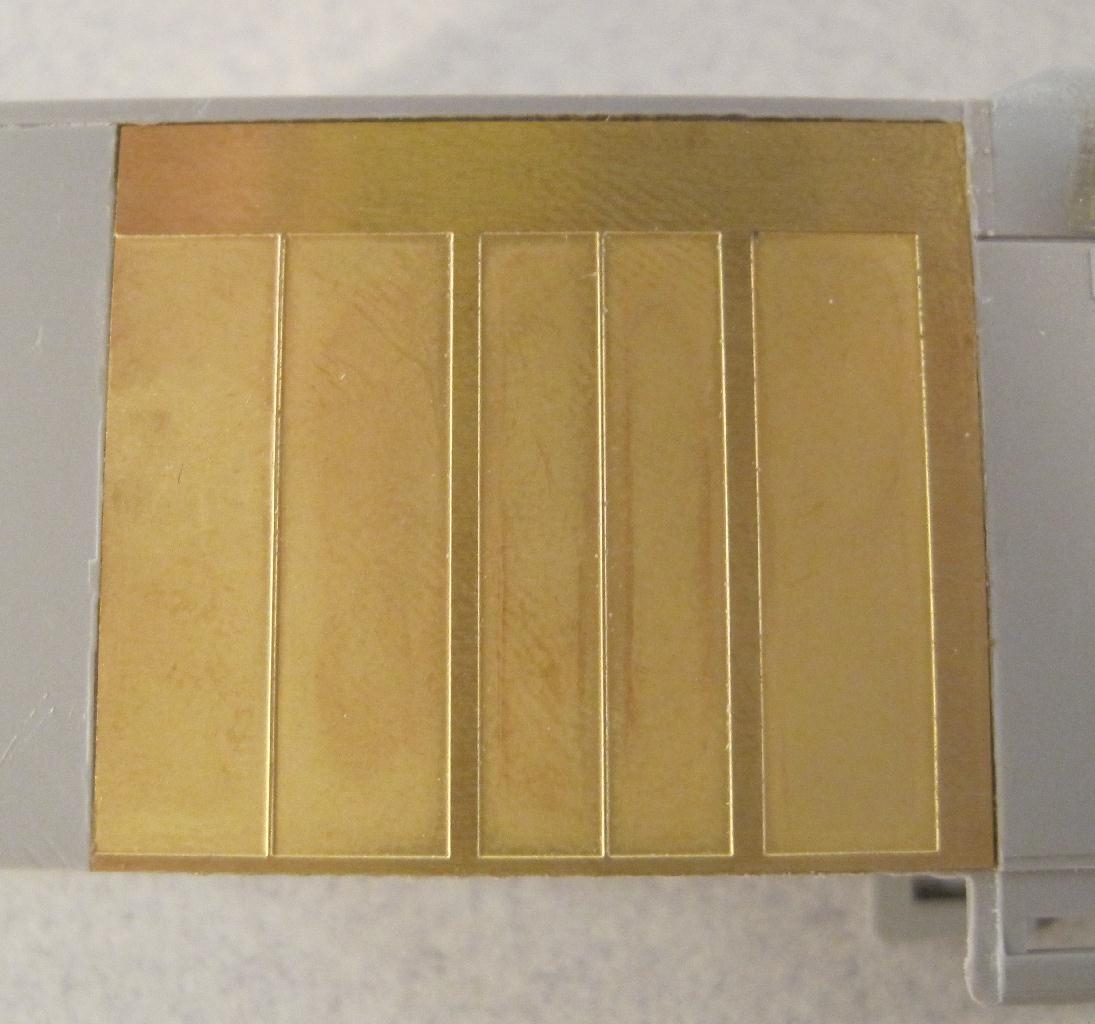
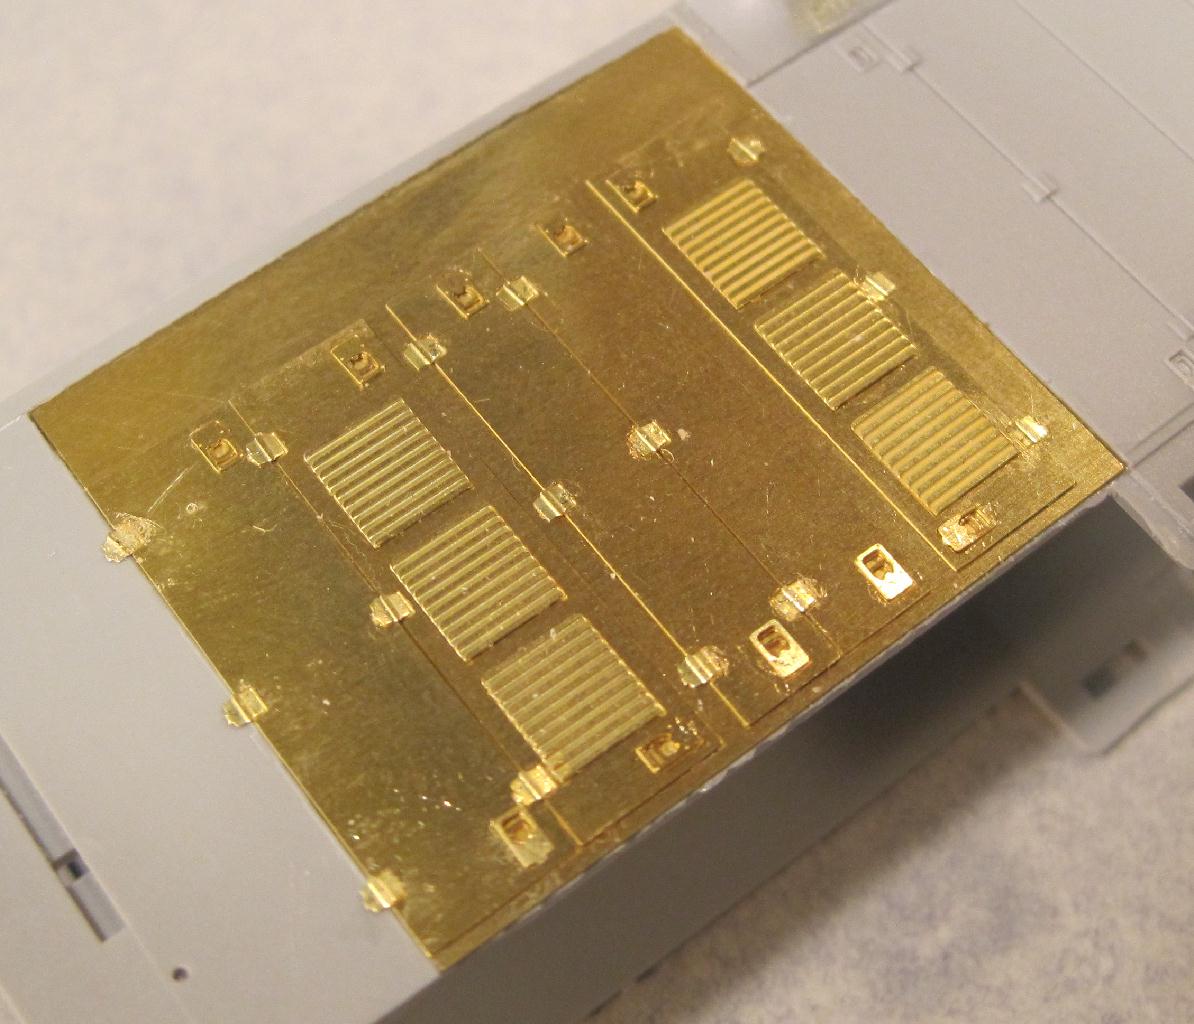
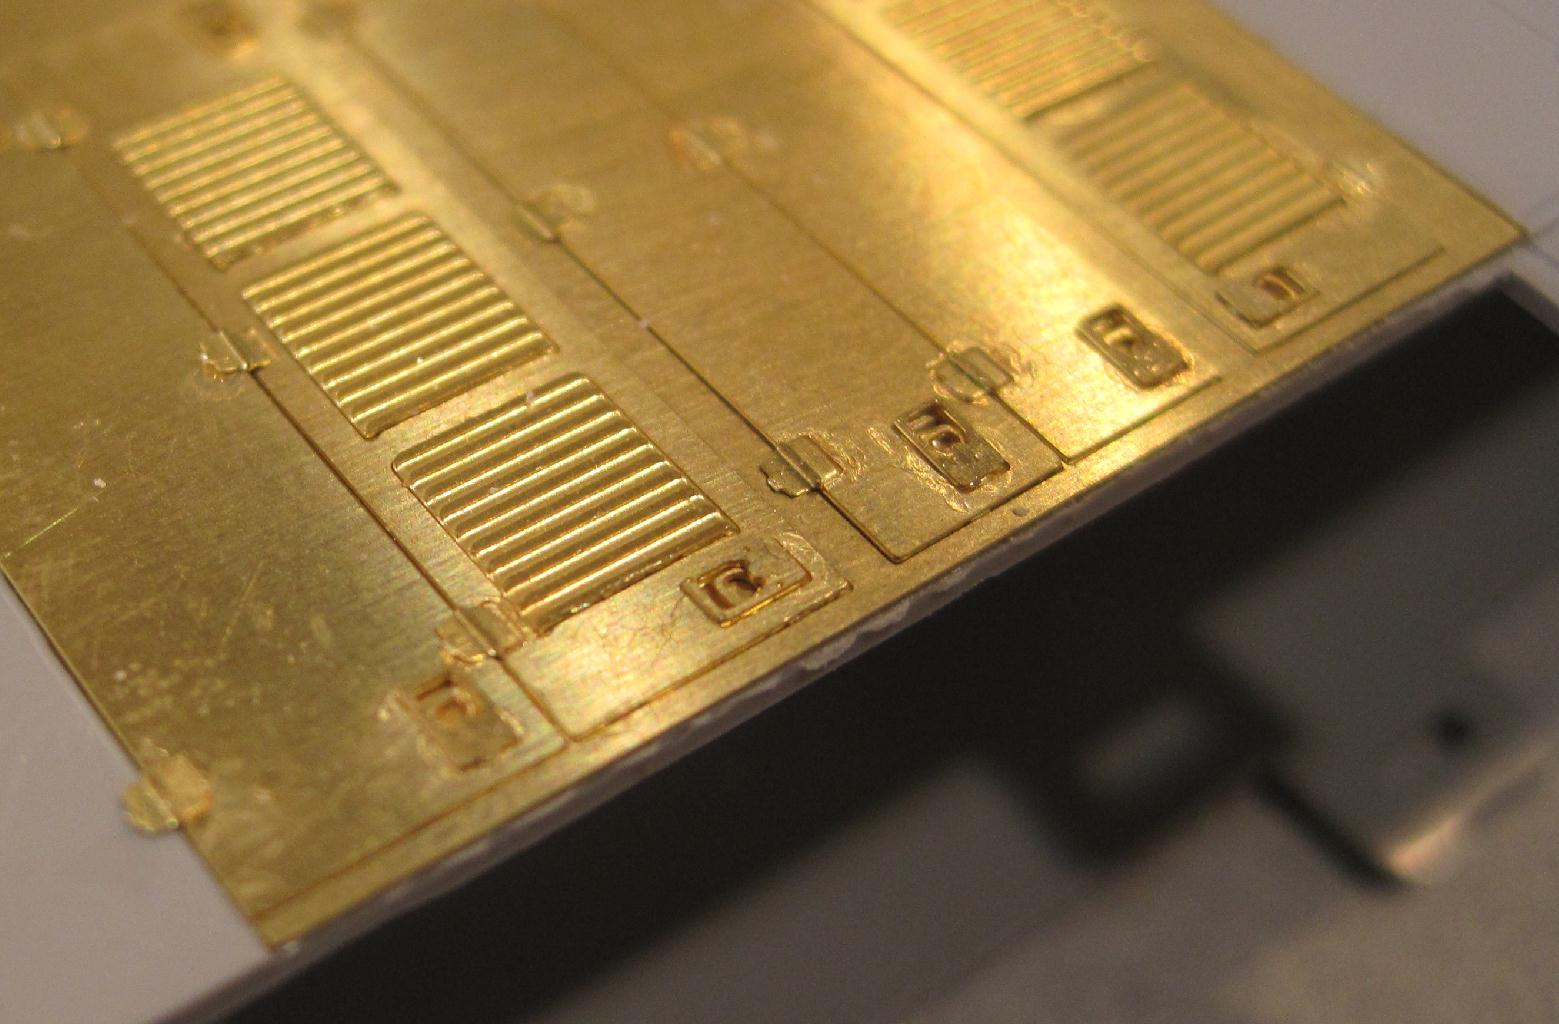
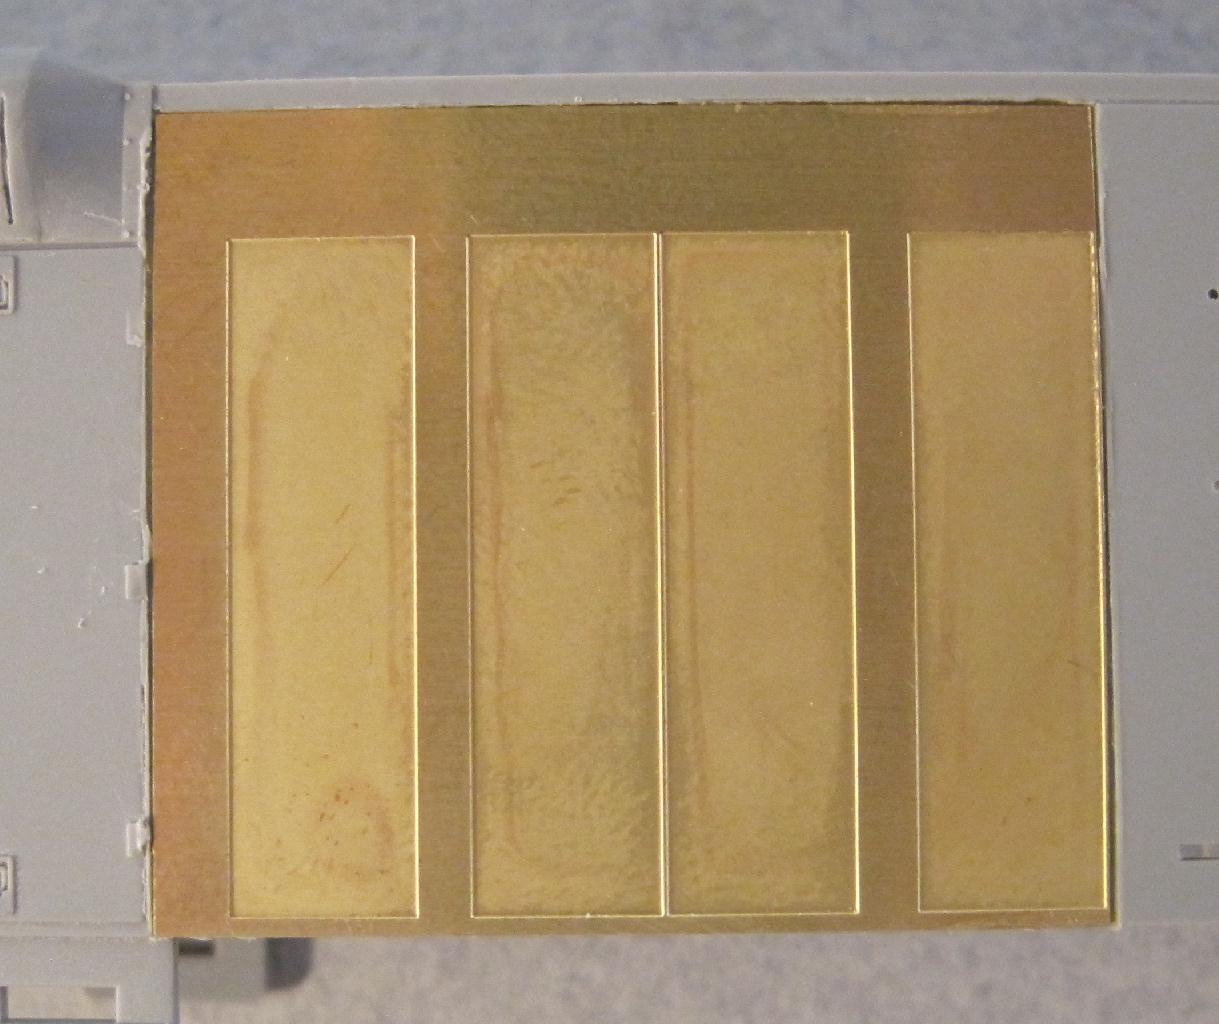
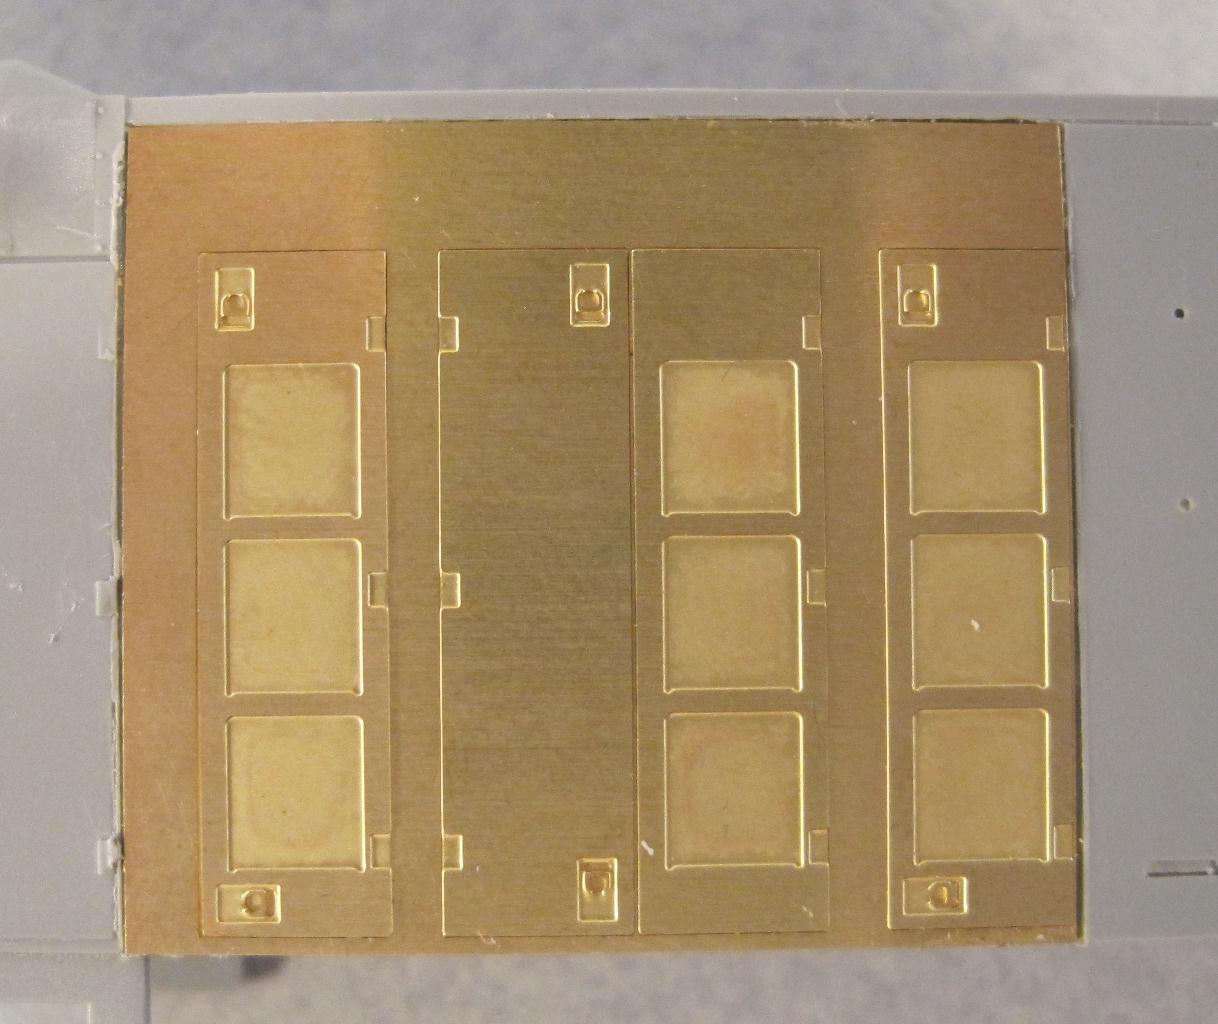
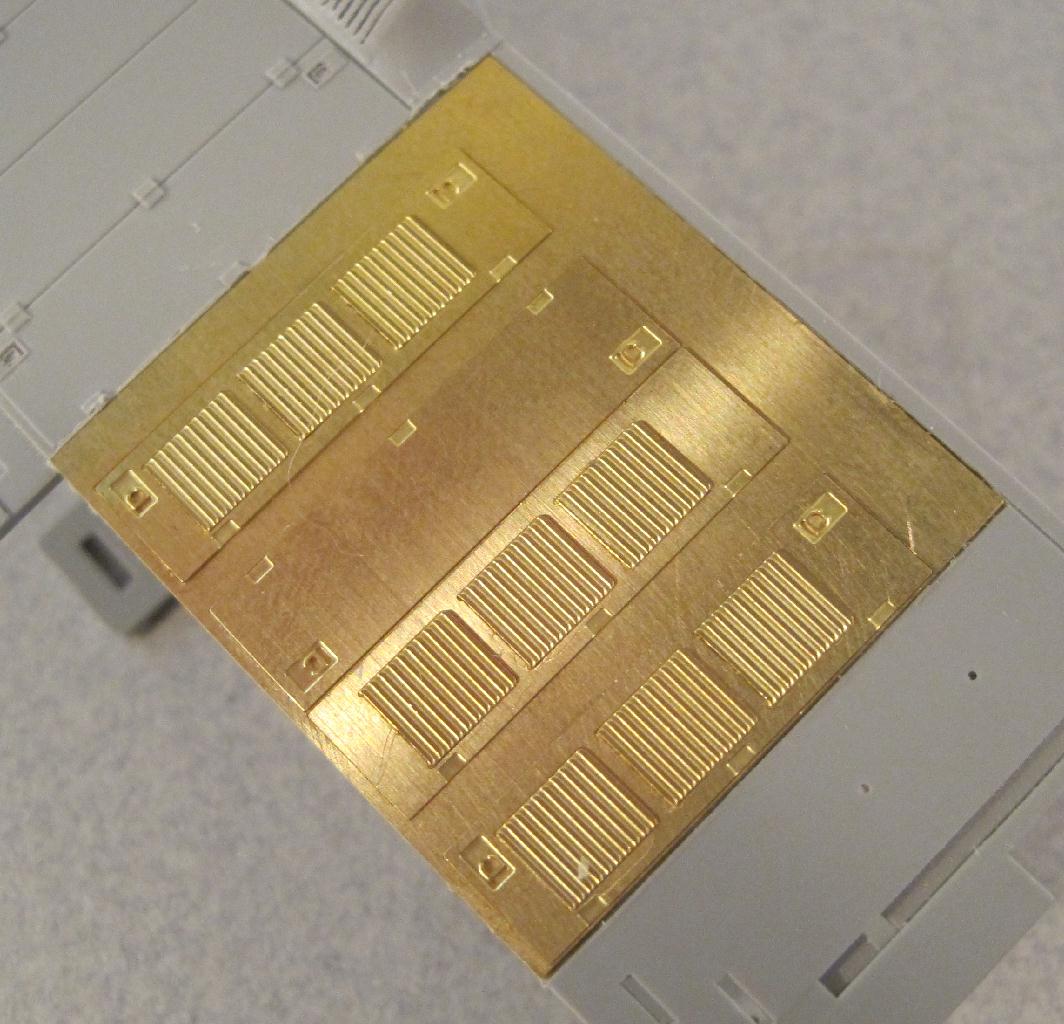
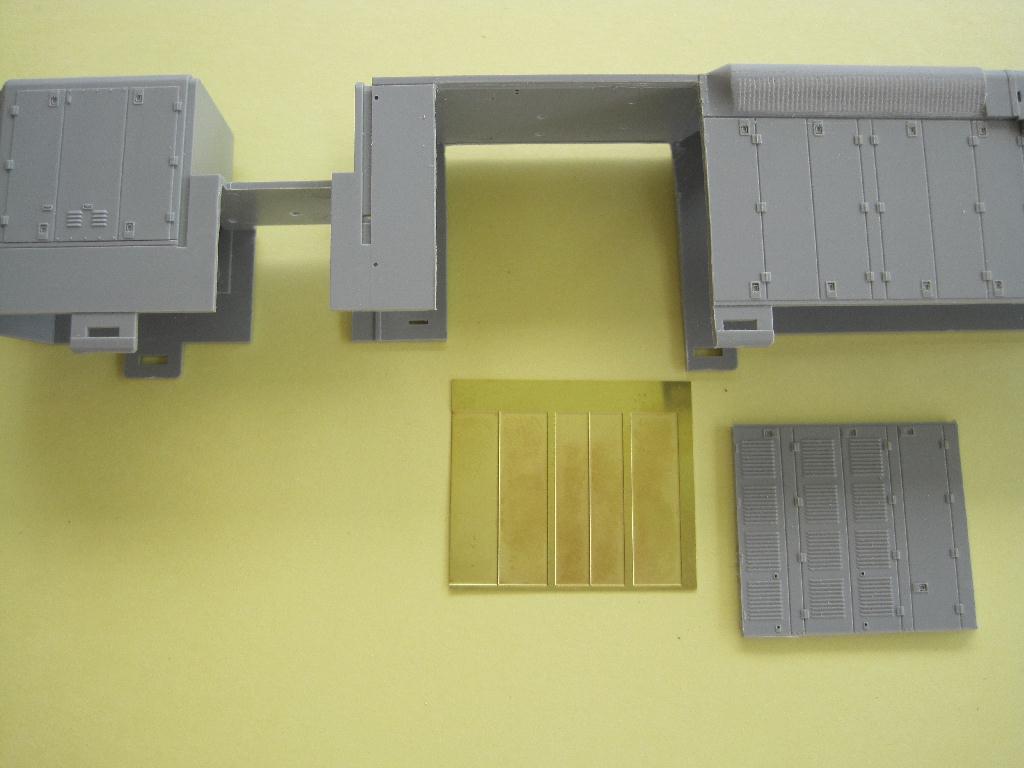
Why didn't I use Cannon doors? Well, Latch direction, louvers and a couple narrow doors. As near as I can tell, these narrow doors are 78" X 15" doors and I do not think Cannon has that size door available. Evenly placing the louvers on the 78" X 22" could be a challenge. And redoing the latches. To make them all look the same, I went with the replacement brass doors. The latches will be made out of brass. The parts shown are for the left side of the unit. This side usually gets the most attention as people notice the turbo housing missing. The right side will also need a new section. From what I have found so far, all the other doors seam to be the same 22" doors.
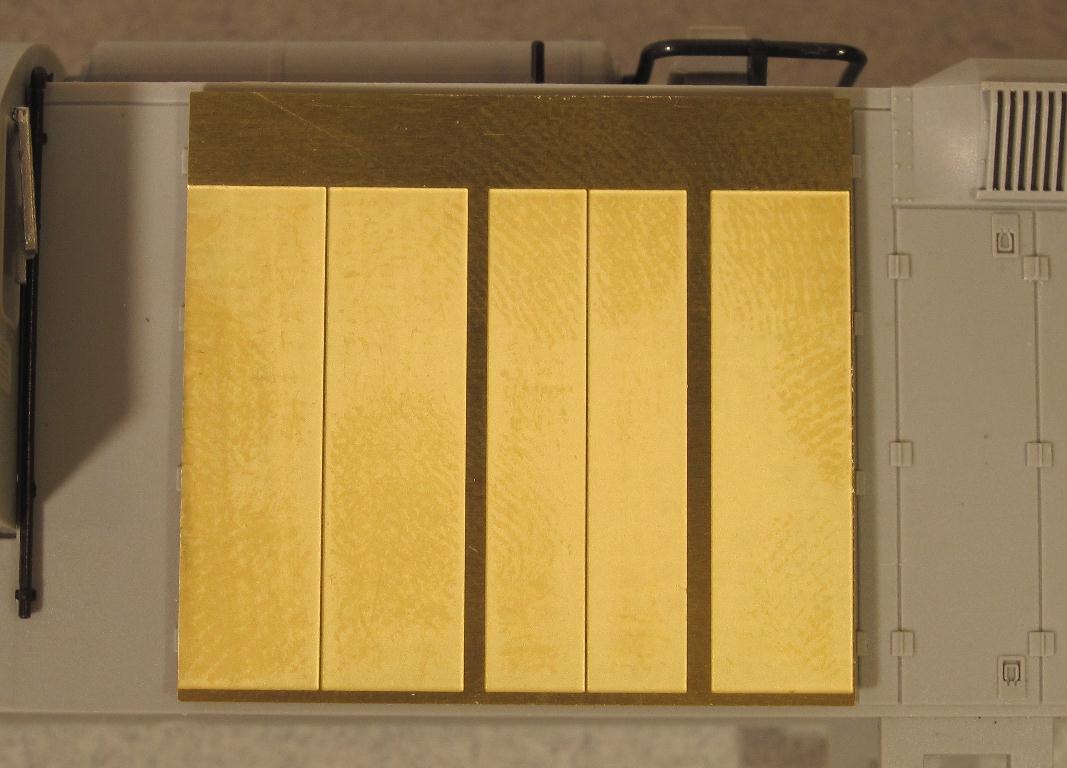
These replacement door walls will be made from .008 brass. Additional styrene will need to be added to the back for strength and to hold the walls in place. The Atlas shell wall is about .040" thick.
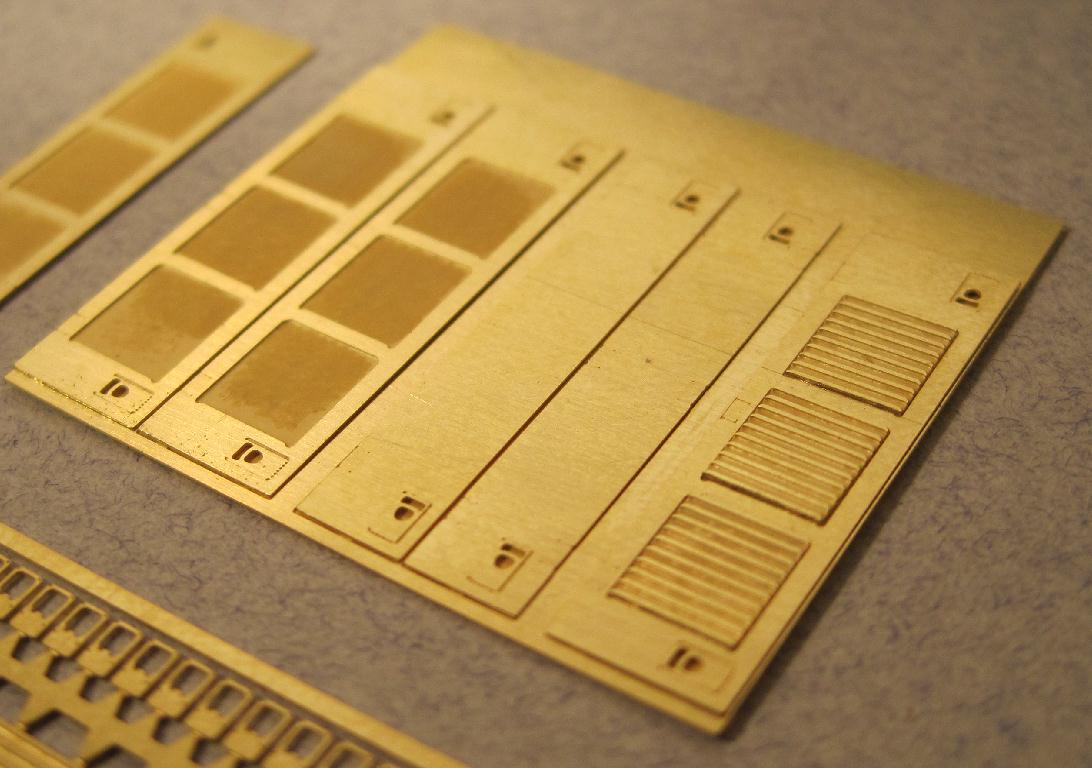
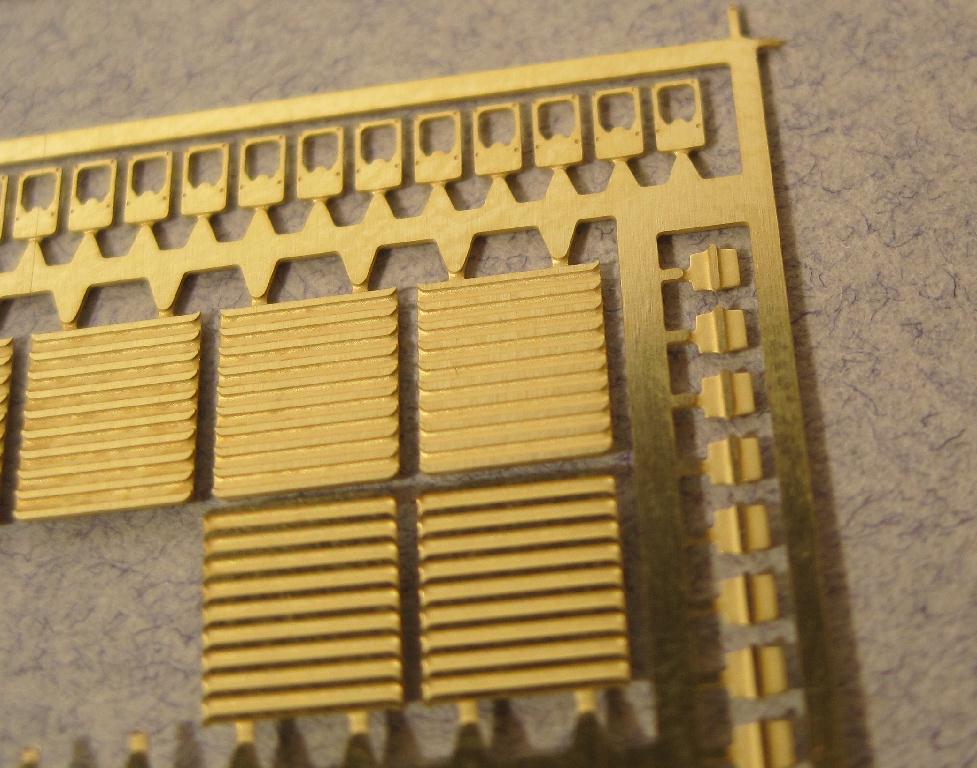
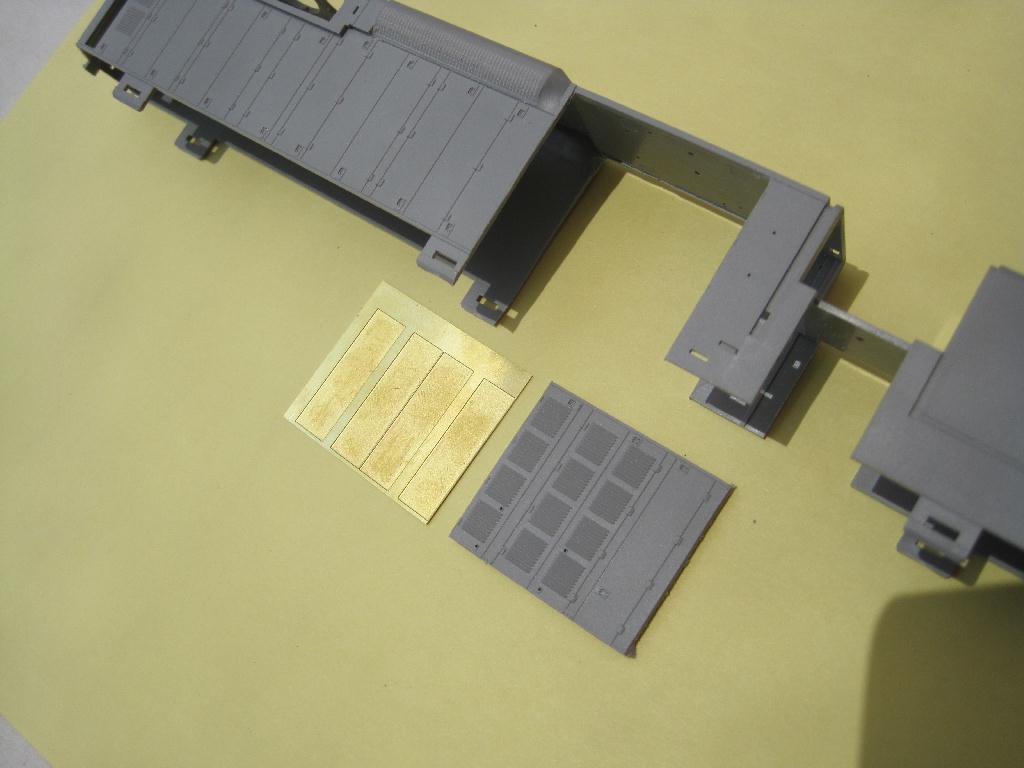
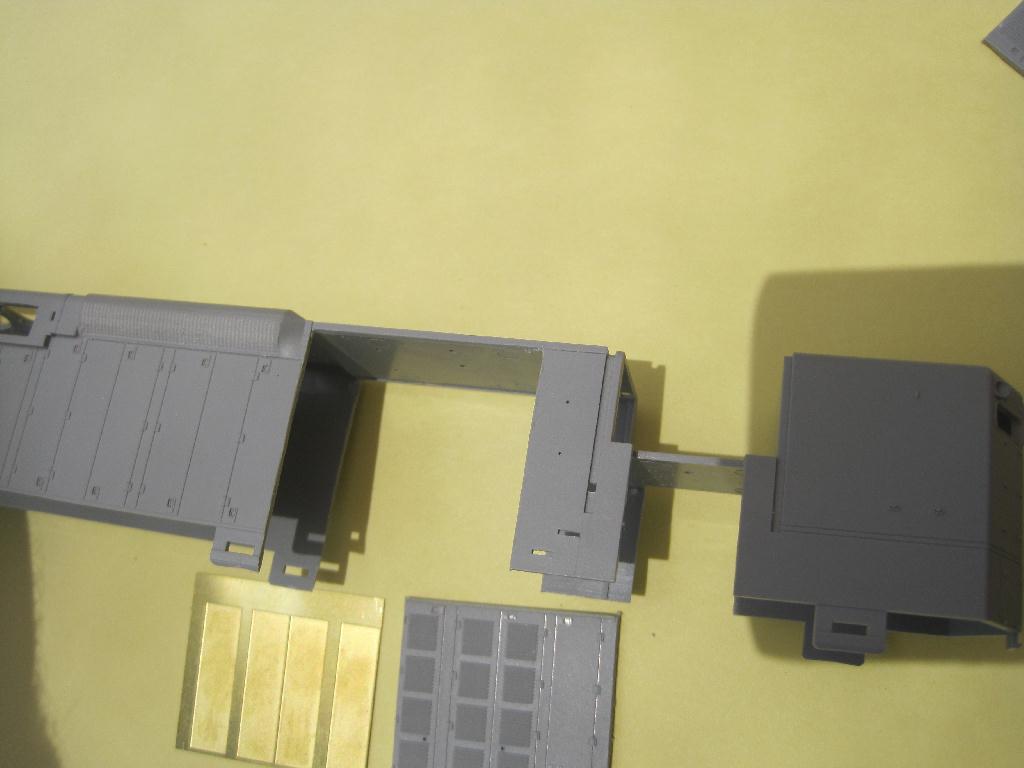
There are a few other SD18/SD24 parts I am expecting with this next batch of test parts.
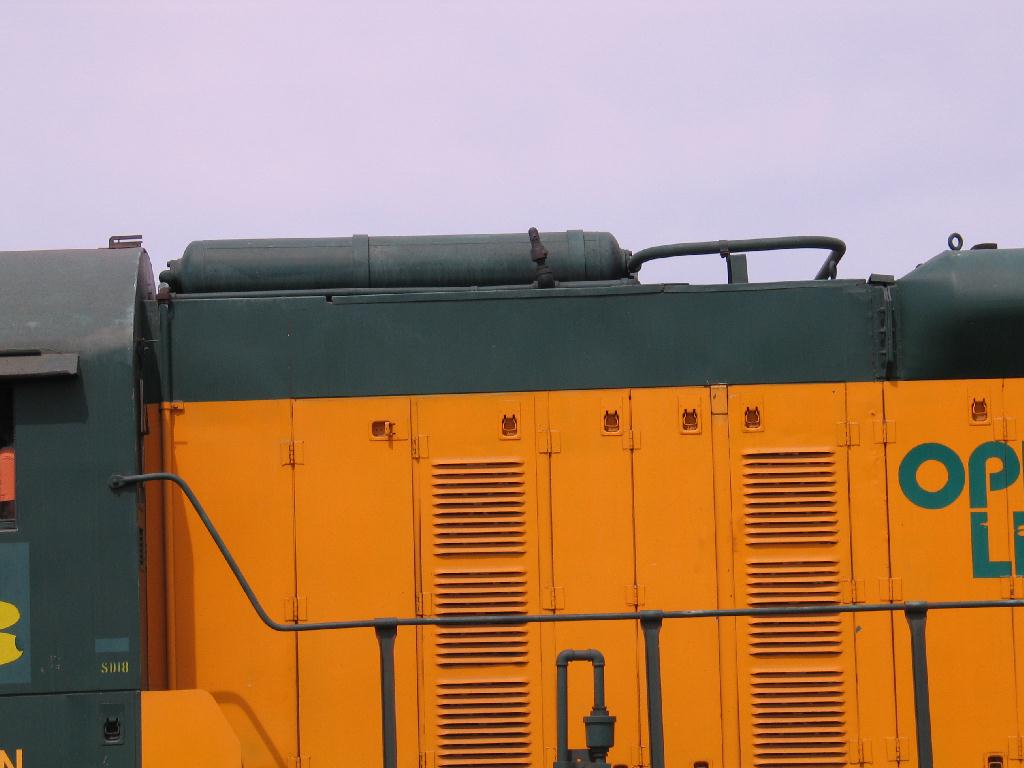
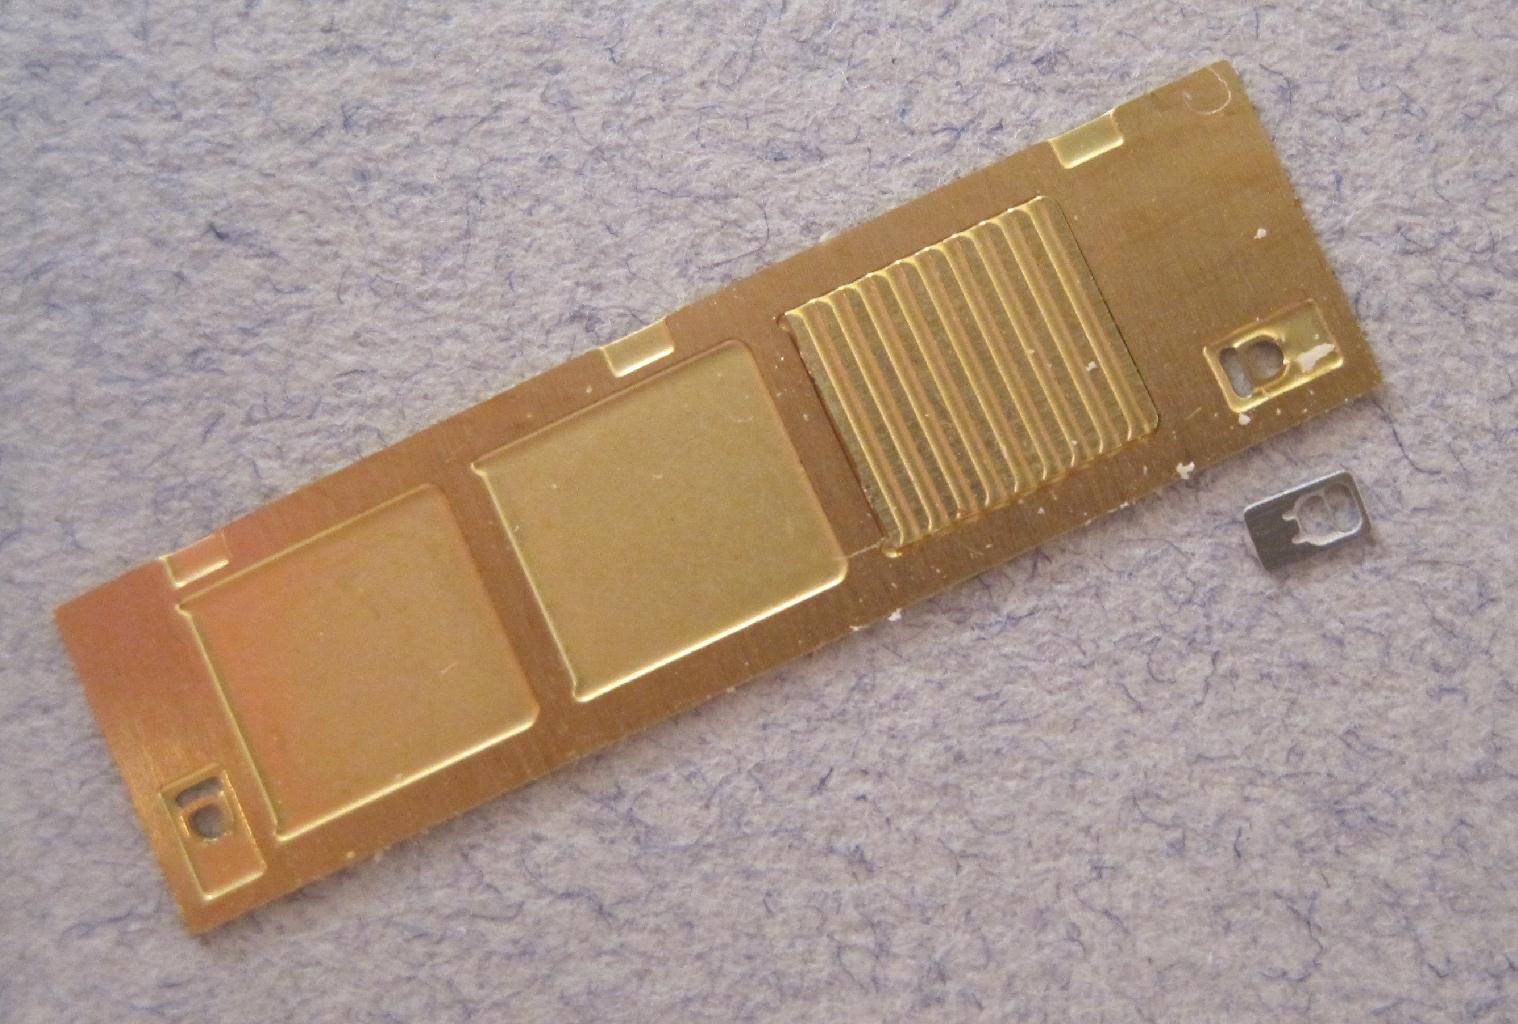
Not in this batch of parts but in the works is a brass plate to plate over the dynamic brake fan openings. The plan is for it to have openings for using Detail Associates exhaust stacks.
The next set of test parts should be here mid Jan. 2012. I will post updates as soon as I get them and test them out.
This is a early rough draft of this page and will be revised as the project progresses. Please bear with me on it's content and feel free to add or make suggestions to it.
Feb. 22 2012
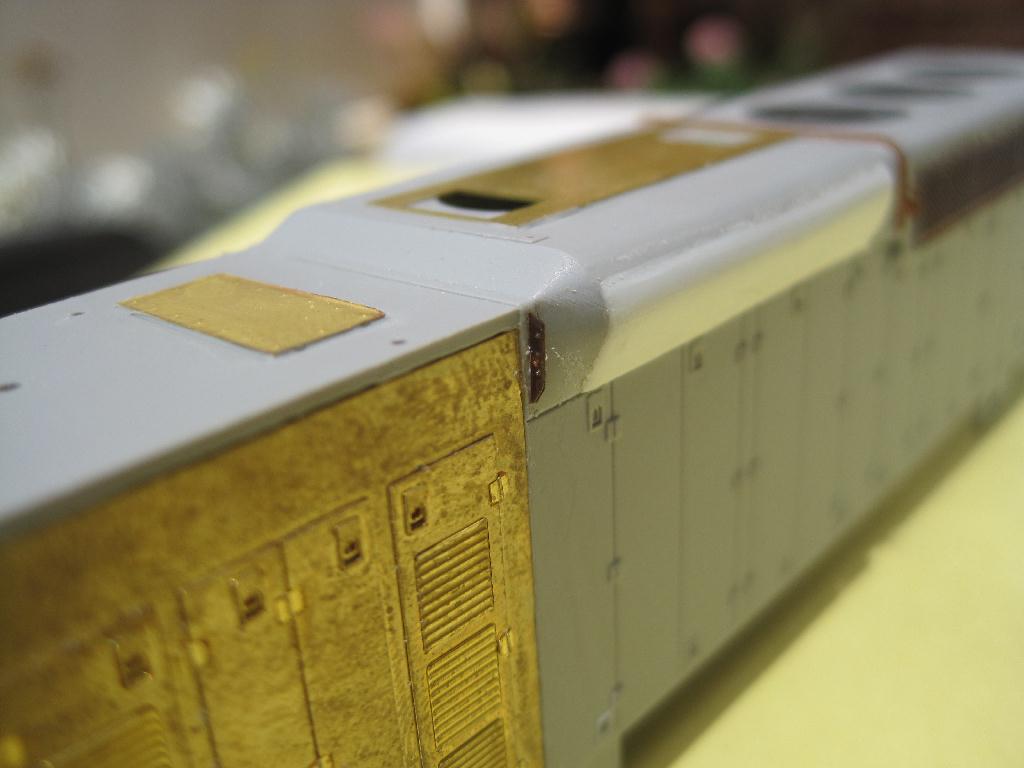
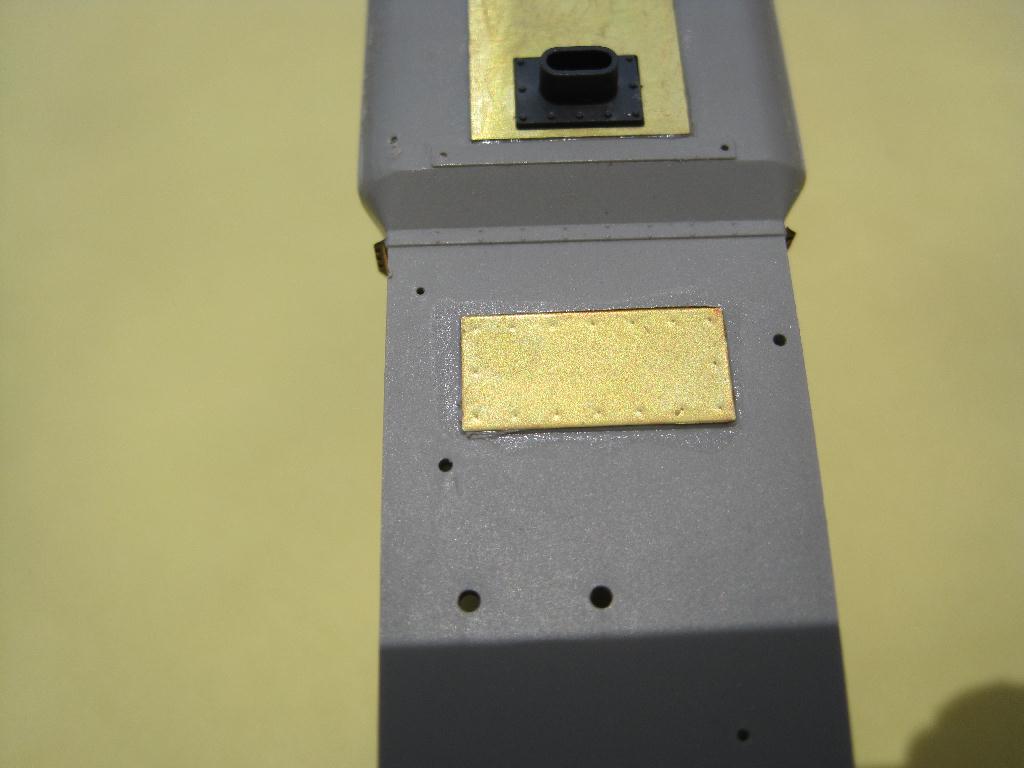
Here are some photos of the left side of the model with test parts being installed.
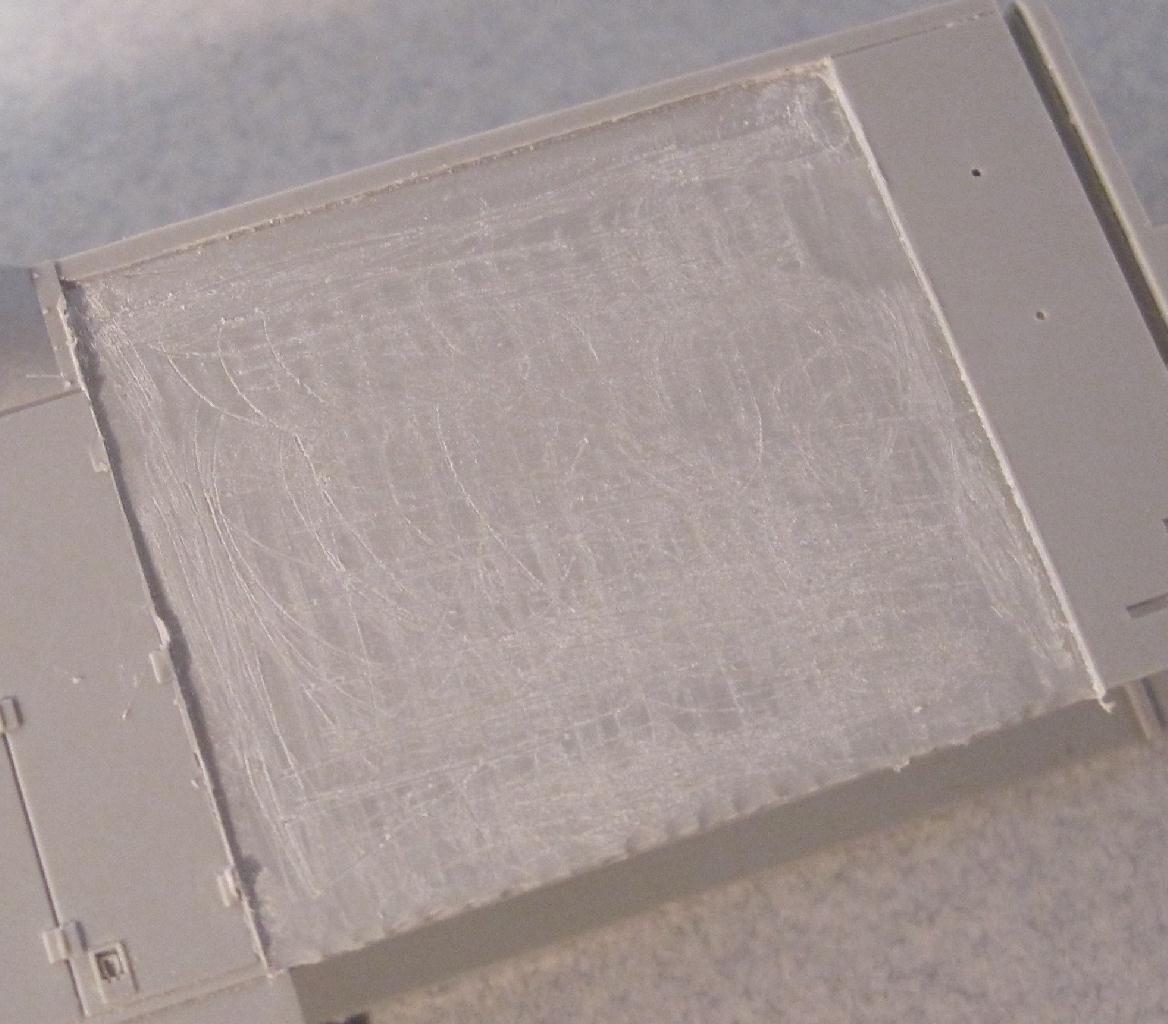
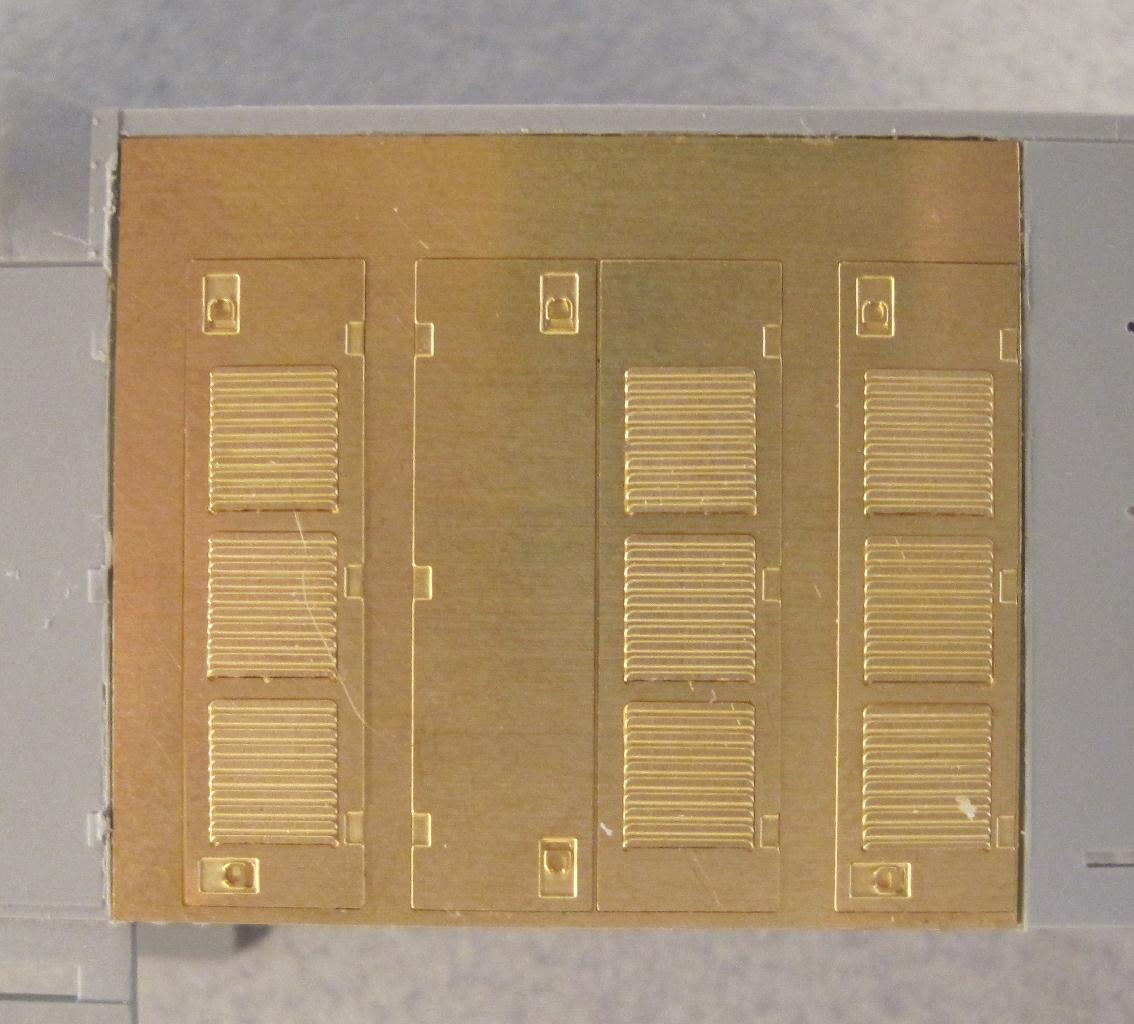
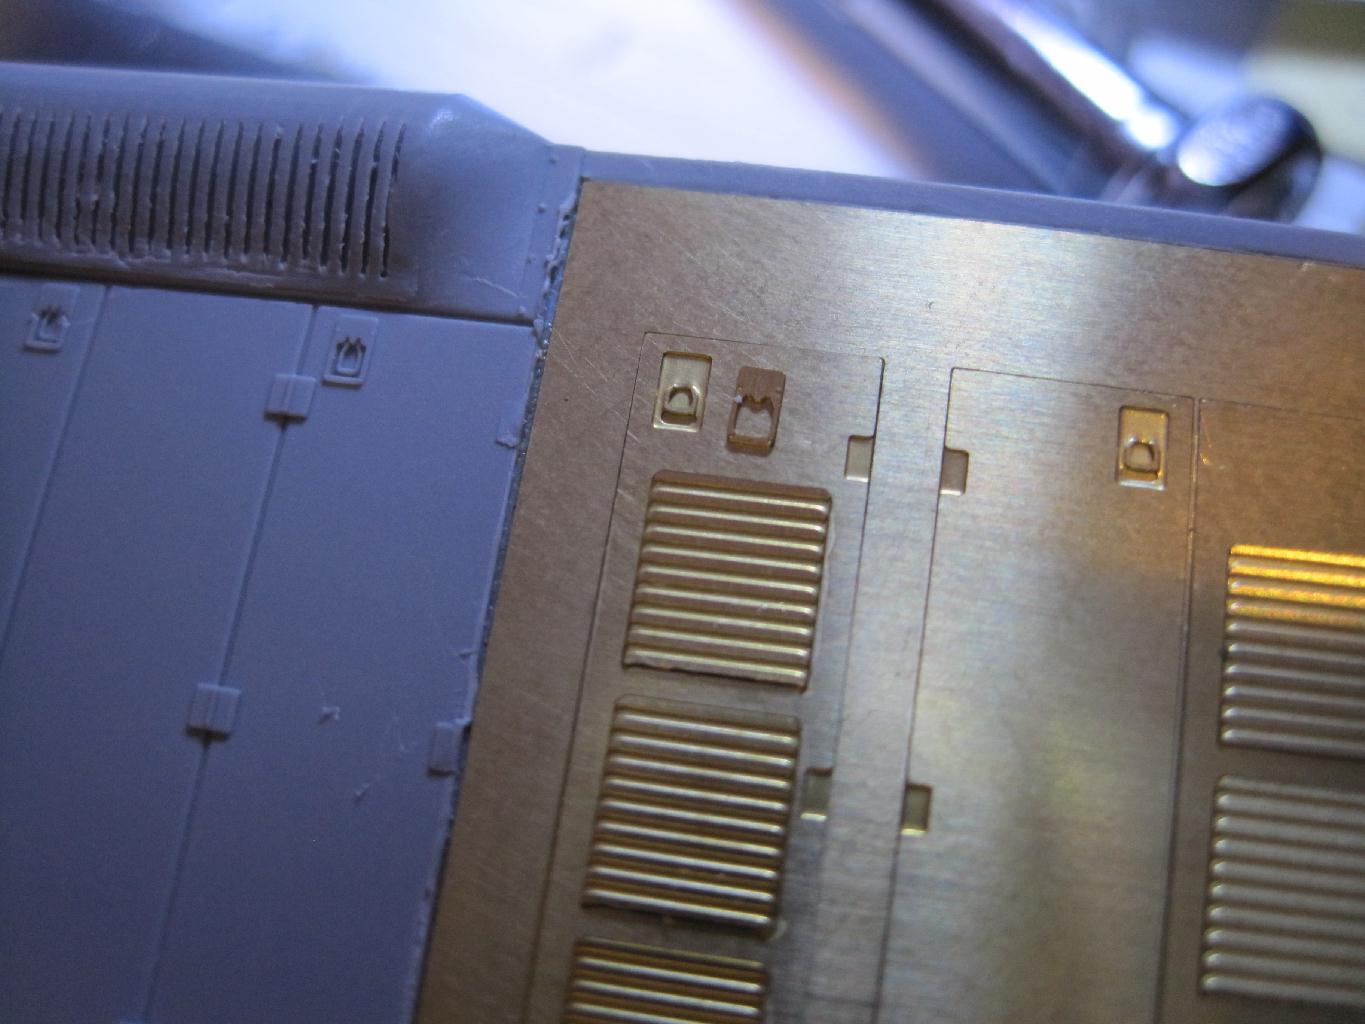
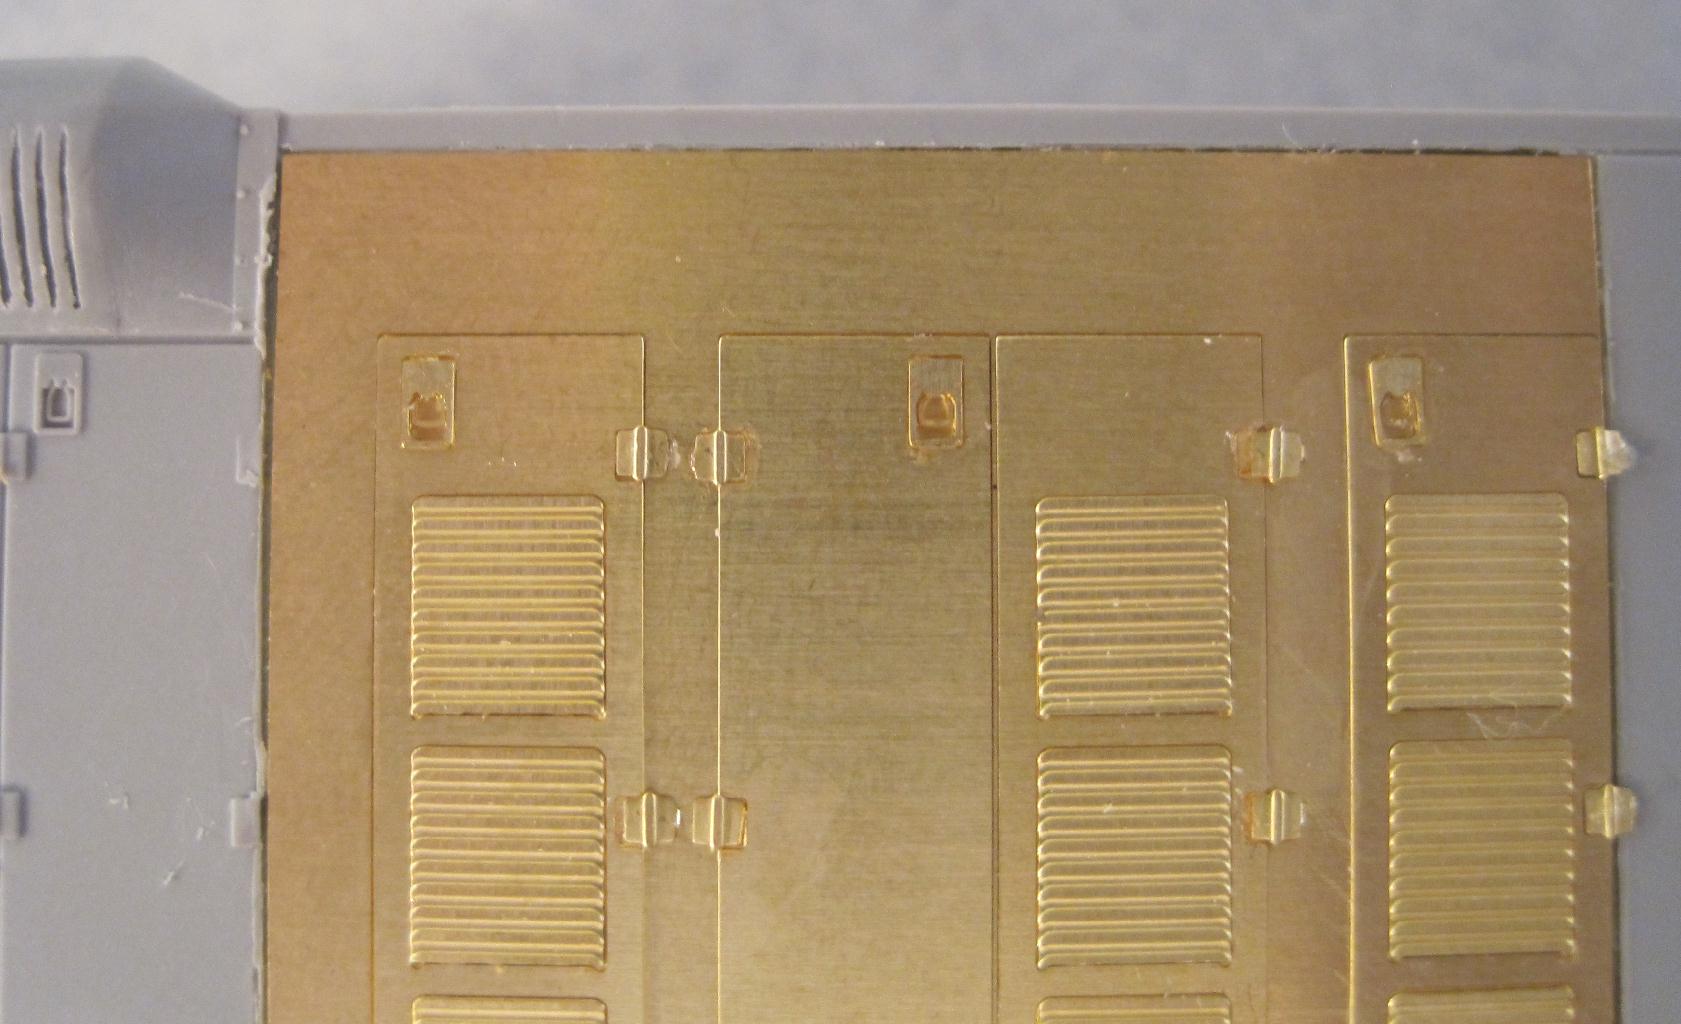
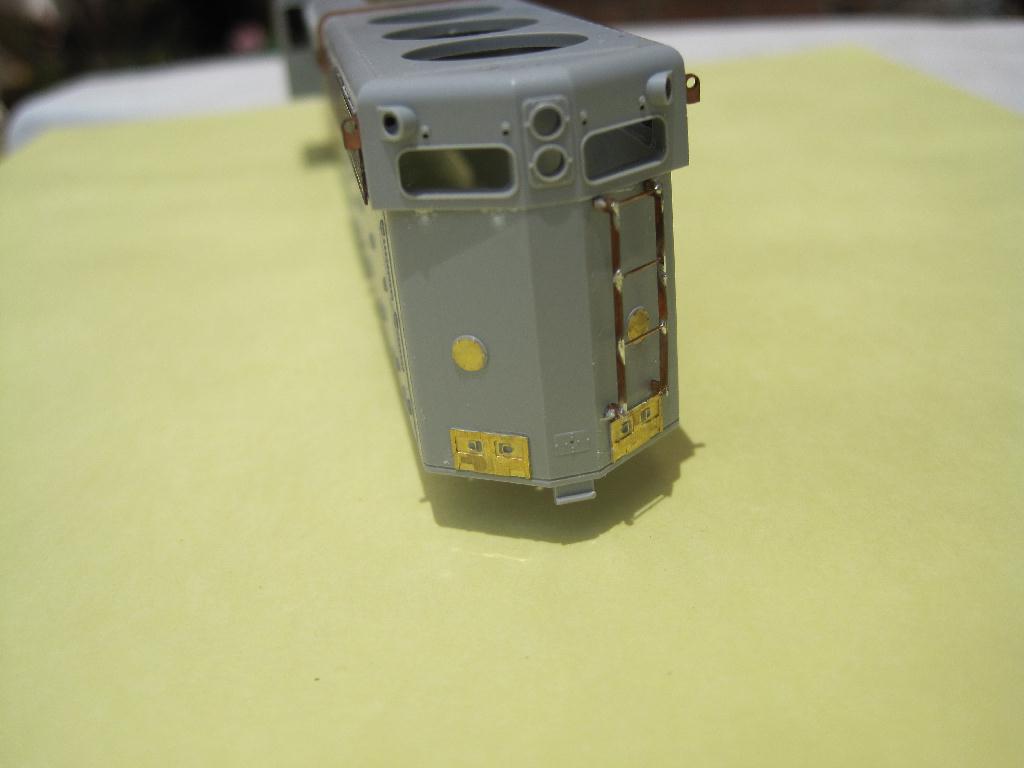
On this first test I decided to mill the side of the shell to accept the new wall. I milled it about .010" below the outside wall of the shell figuring about .002" for the Barge glue film. The brass wall thickness is .008" My original thought was to cut out this area and build up the backing with styrene sheet. I will be trying this method to see how it works out and to see if it is any fast. The milling process was not that easy, for me anyway. Here you can see the milled side and a new brass wall glued into the opening. Notice the etched areas for the doors. The two smaller doors are the same on all units. But the larger doors vary from unit to unit and I will try to make it possible to duplicate any unit. The third photos is with all parts added in place.
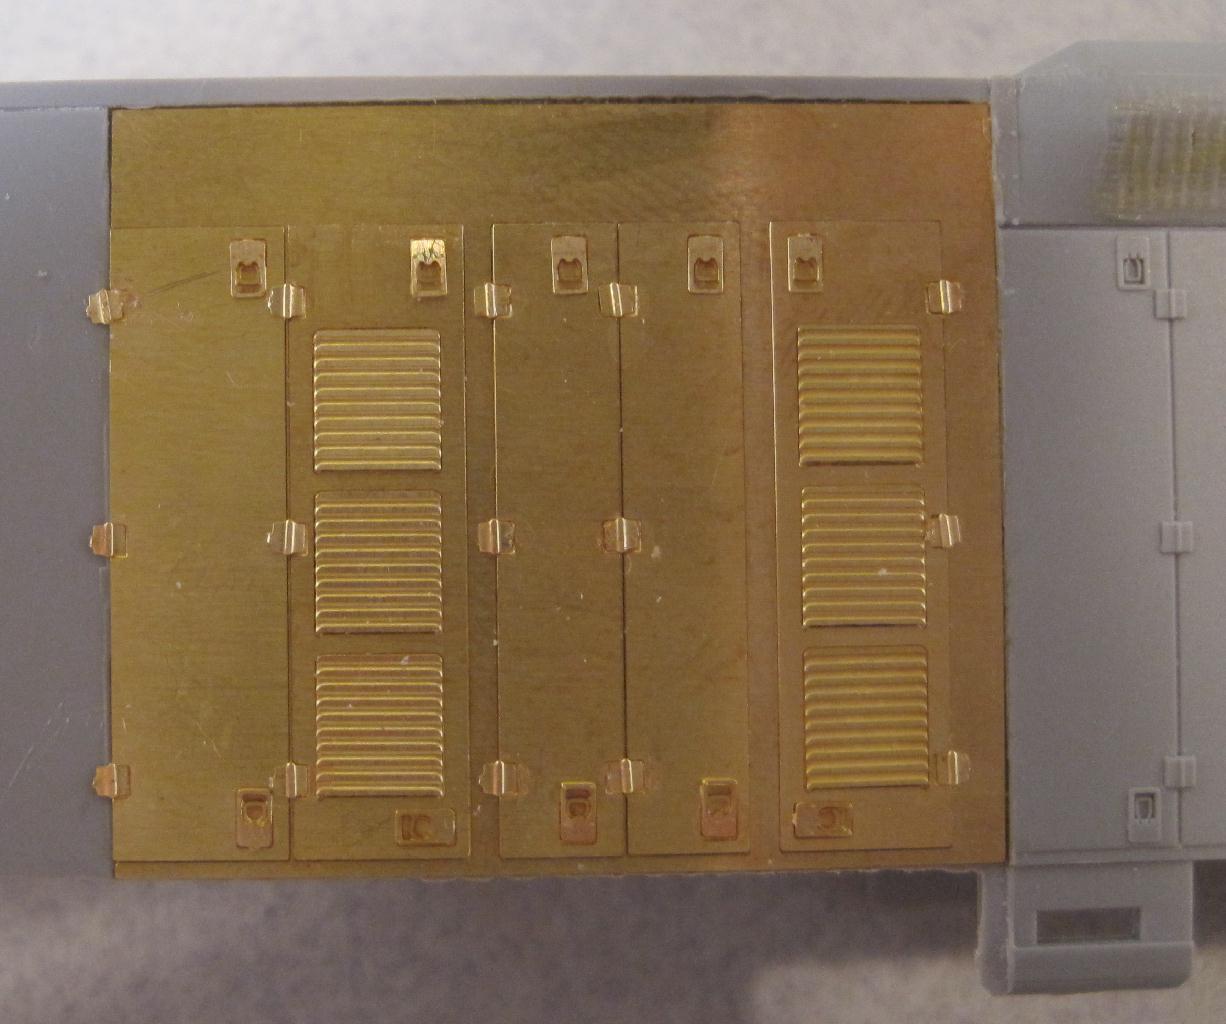
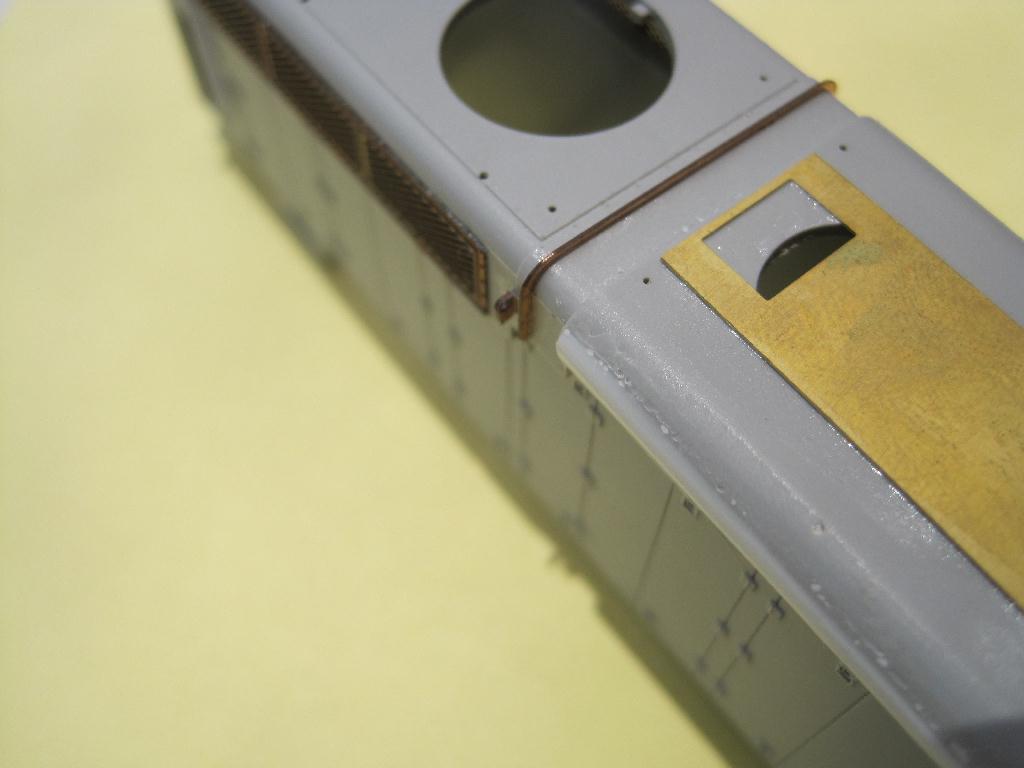
This group of photos shows the parts from a few different angles. I will admit that adding the latches and hinges is not the easiest job. Some patience will be required. I used Barge glue to add all of these parts, even the hinges. Using a CA type glue might work as well. In the last photo you can see a door with all the etched areas for louvers, latches and hinges.
March 15 2012
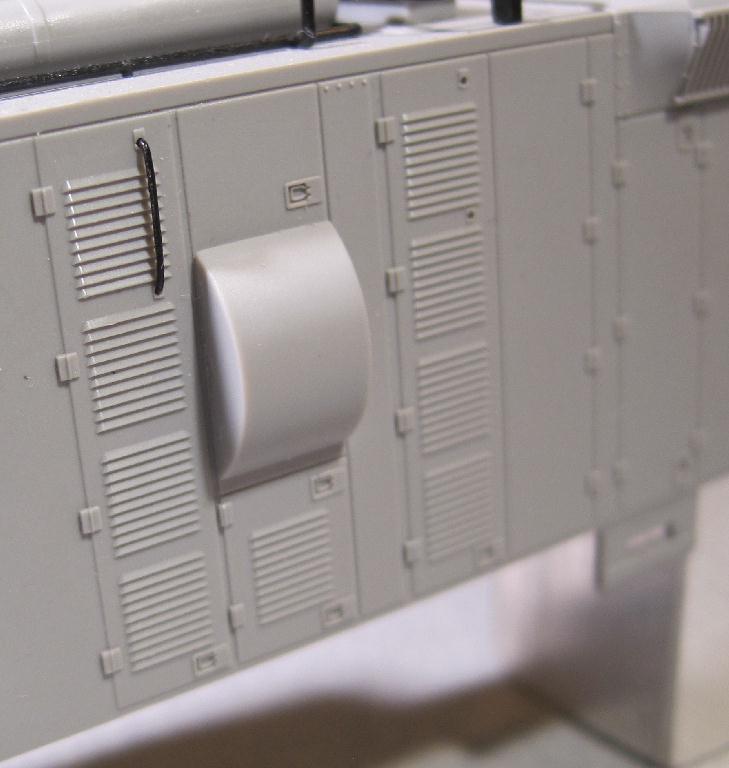
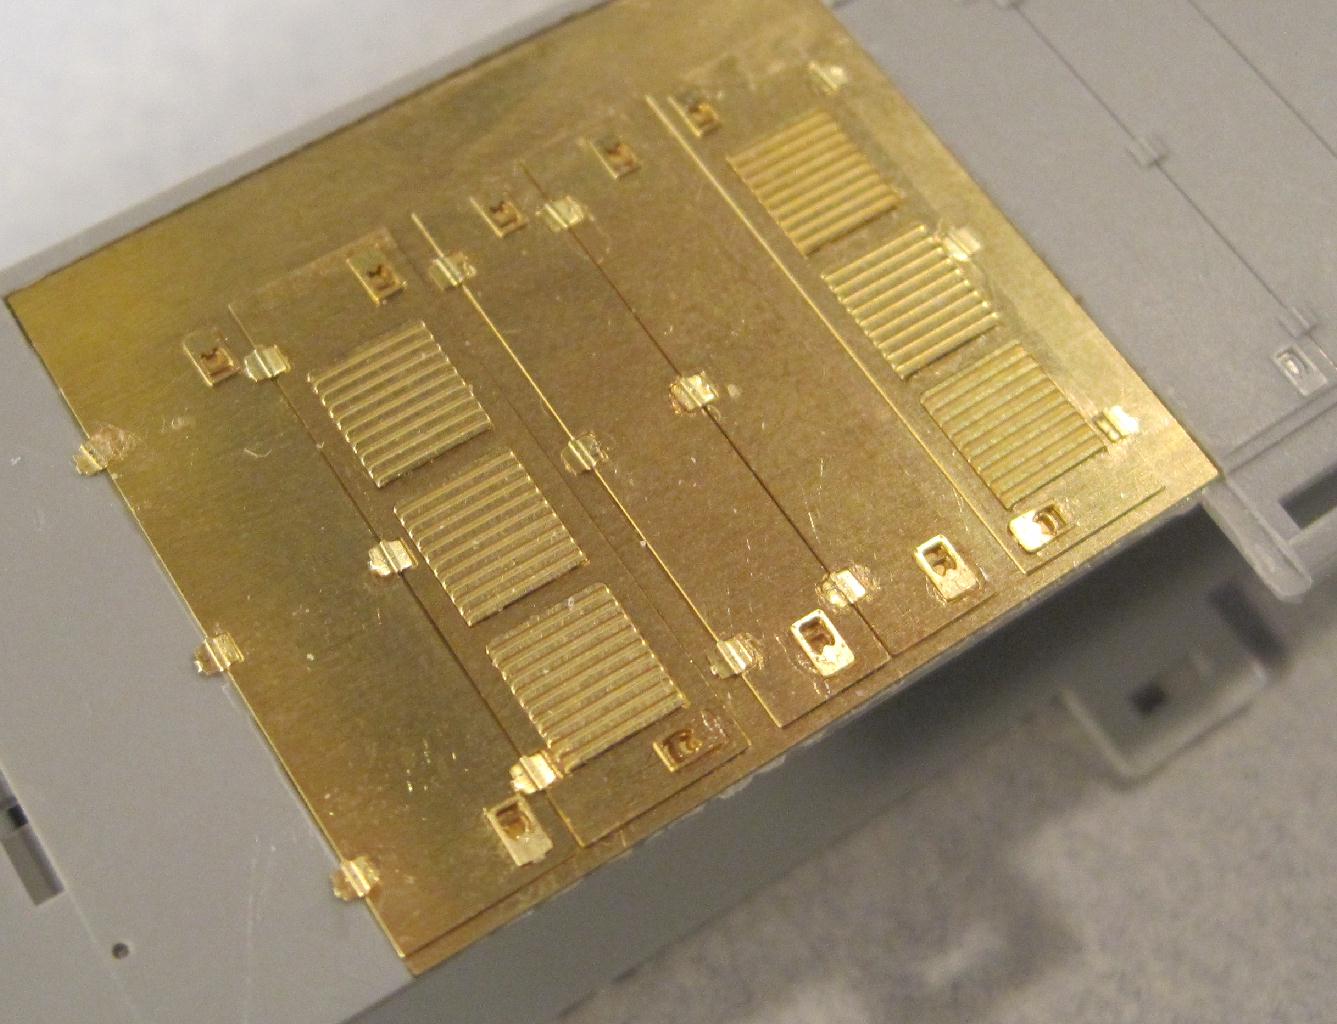
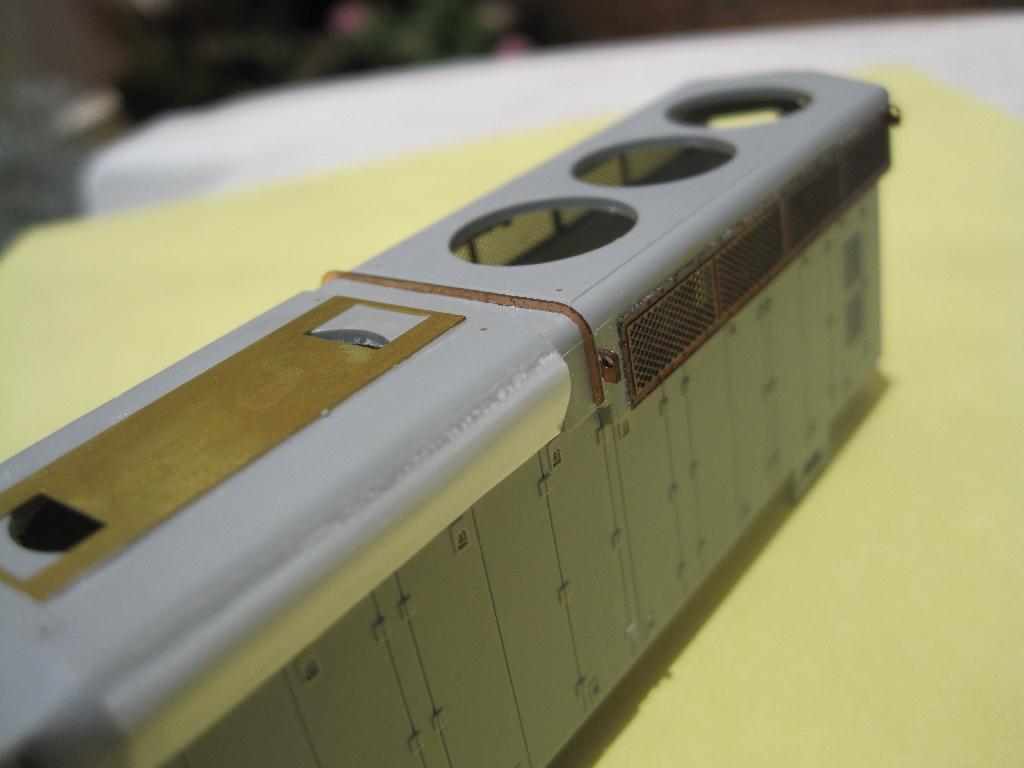
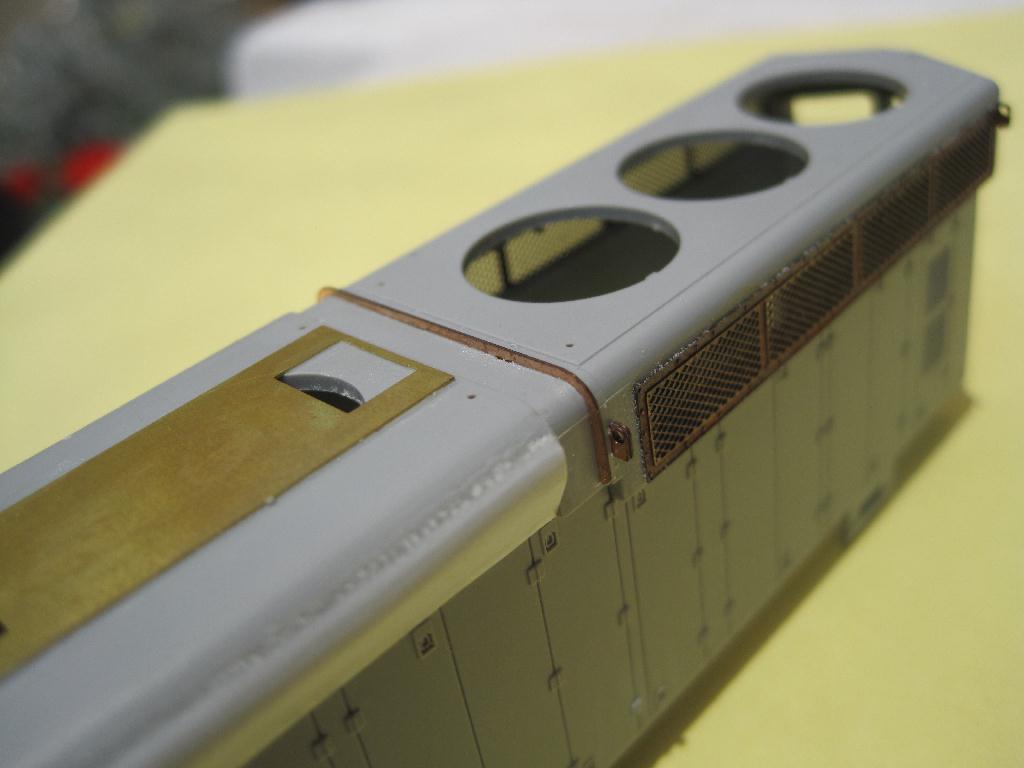
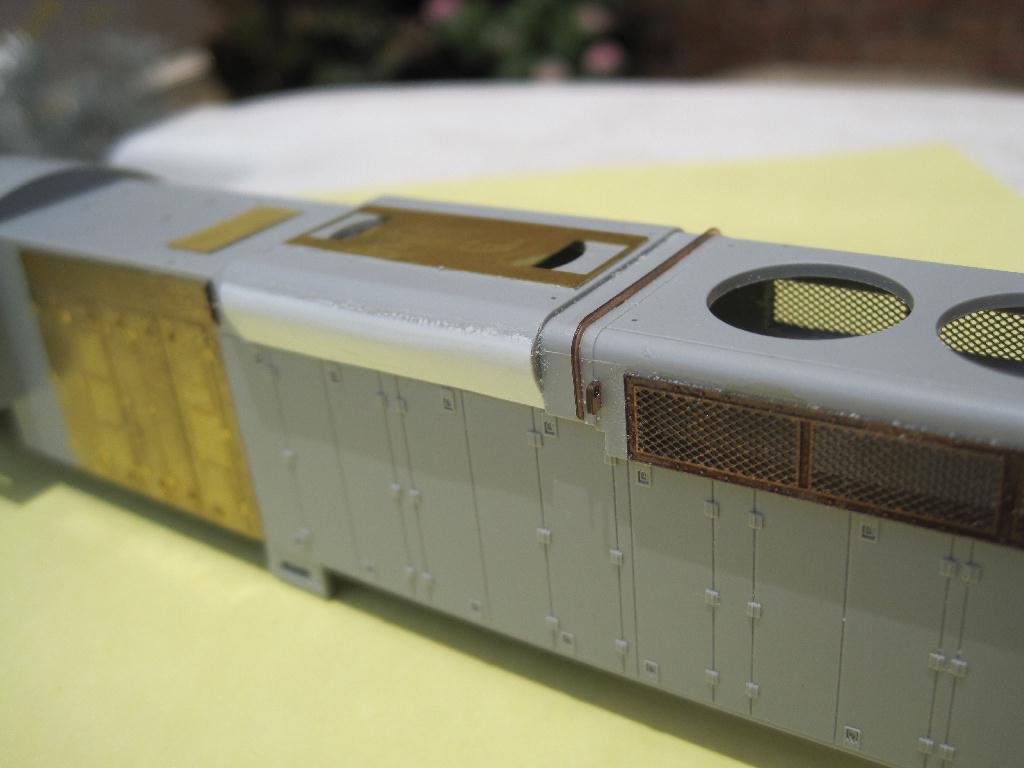
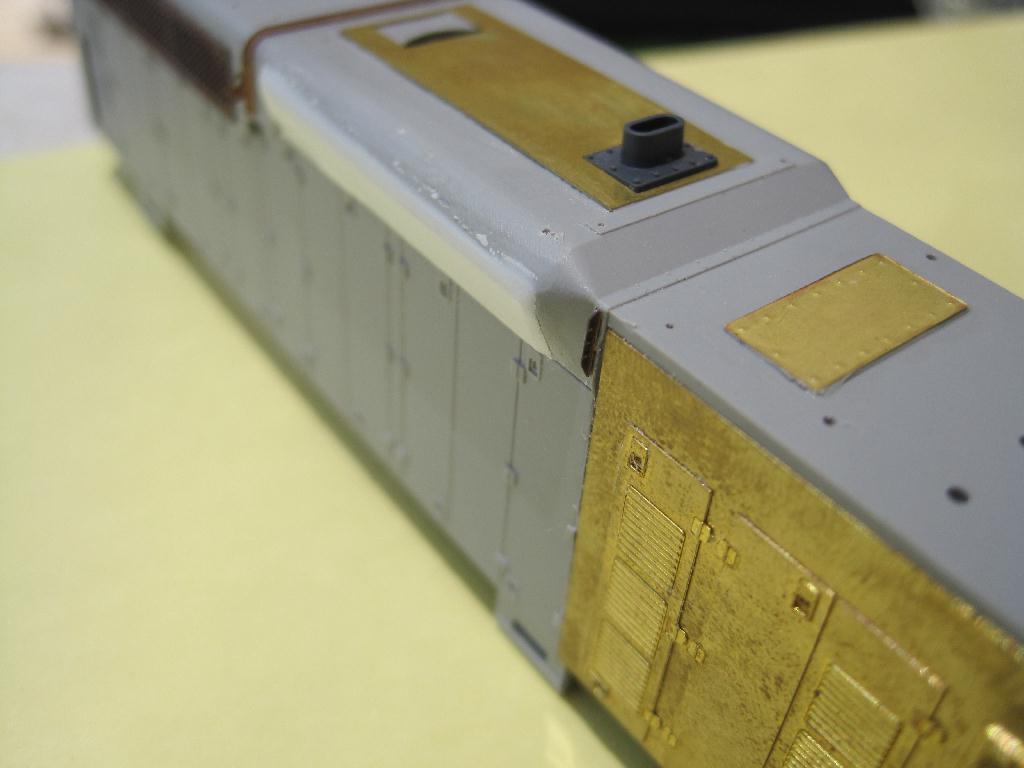
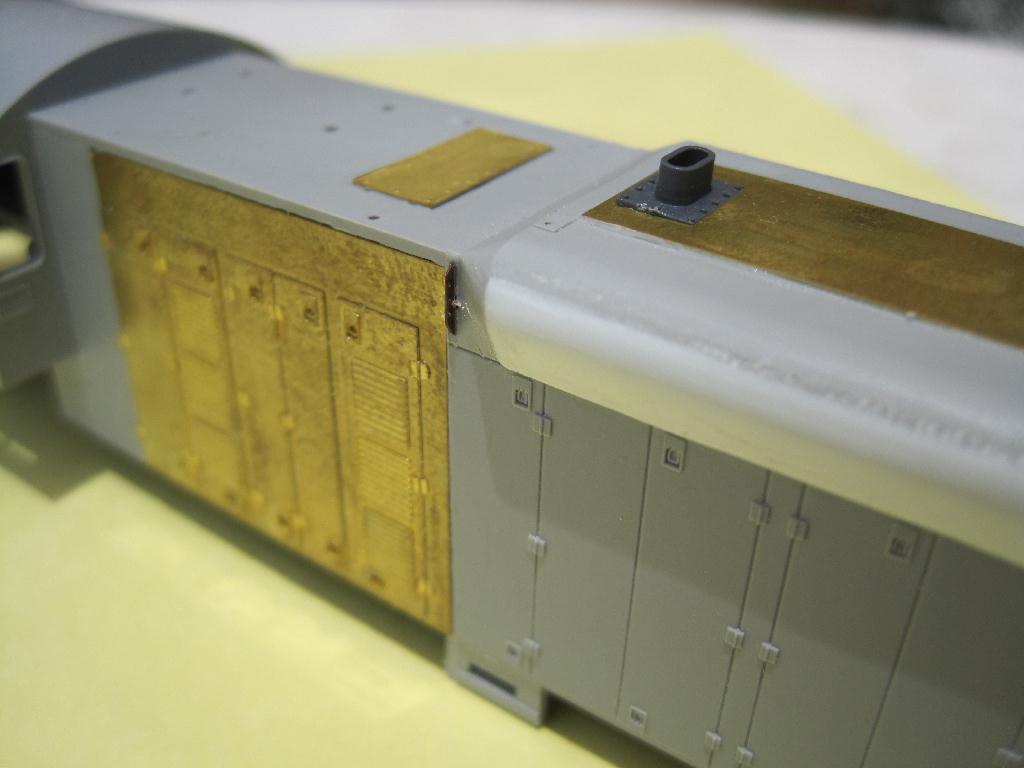
Here is a batch of photos of the right side being assembled with test parts. For the most part I am pleased with the fit and assembly of the parts. Making one more set of tweaks to a few of the parts.
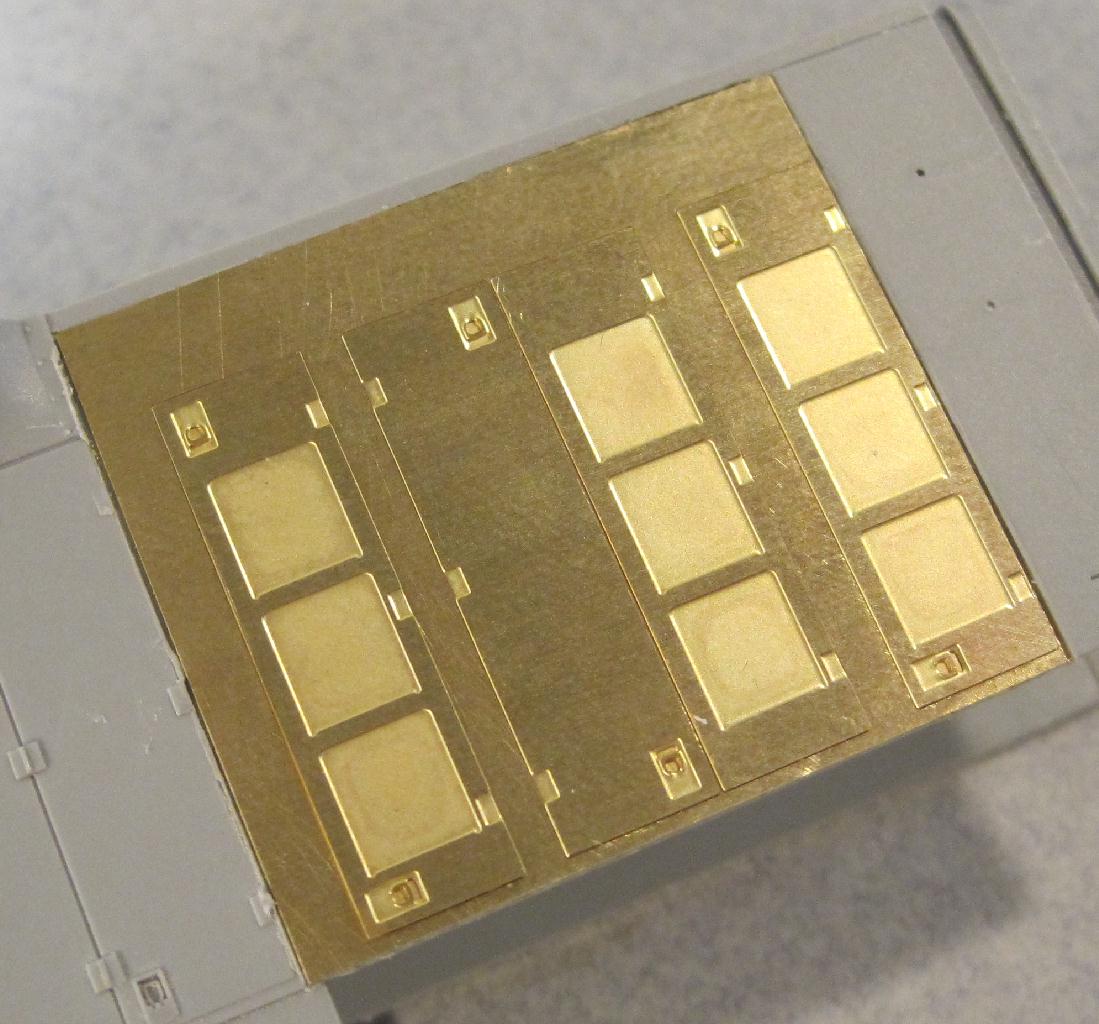

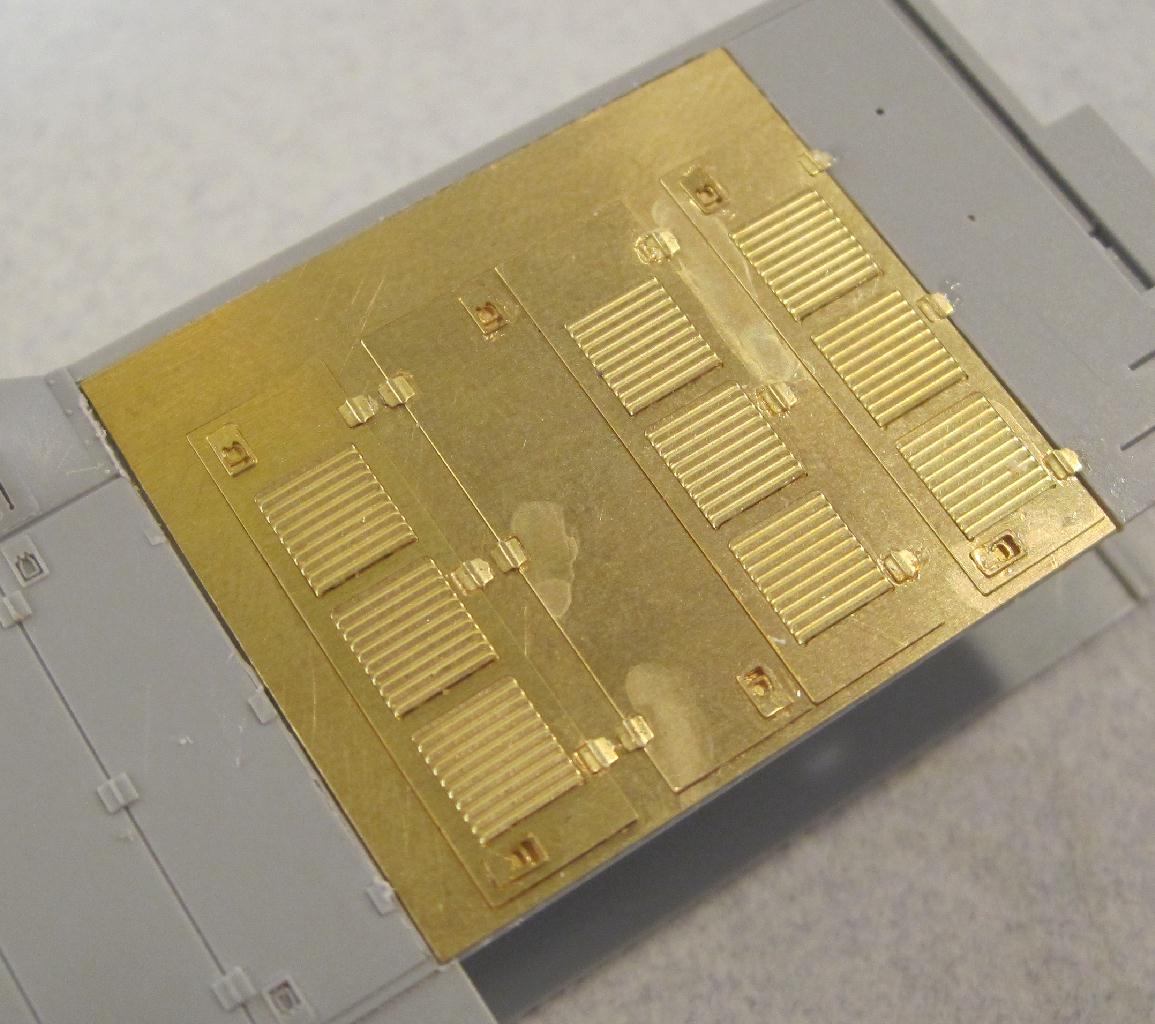
I have been searching online for photos of all of the CNW SD18 units. So far I have only found one unit, #6636, that would have this right side door configuration. I am putting together a unofficial list of door configurations and it looks like there are at least four variations. Most of the units carry the same configuration so the other configurations may be a result of shop repairs. I will post the list here once I have the kits done. the kit will contain enough doors to build any one of the configurations I know of. During those online searches I have noticed a few other small details I can add to the kit. Those are on the next set of test parts.
After spending some time on the web looking at photos of both CNW SD18's and Southern SD24's, I have come to the assumption that Southern did a rebuild on their SD24's in the early 70's. From what I see, they added the small inspection doors(?) the the front snd rear of the unit, removed one of the ladders and shortened the other. There are also some kind of brackets or something added in front of and behind the dynamic brake section. All three of these details will be part of this kit. The ex-UP units do not have these details and still have the two original sized ladders. So, do I make two kits available, one for the high nose and one for the low nose? A all in one kit would only be a few dollars more, but why pay extra fro parts you don't need. Once I get all the parts developed I will see if the ditterence is reall that much different. There is also a good chance I will do a "rebuild' kit for the Southern modelers.


As always, I thank you for your interest in this project. Feedback and input is always appreciated.
Go to Diesel Details or home page