Modeling UP PS2CD 5250cf #221414
photo of the prototype car
UP series 221100 - 221399 - CH-125-003 - gravity discharge gates
UP series 222000 - 222199 - CH-125-003 - gravity/pneumatic gates
built 1970
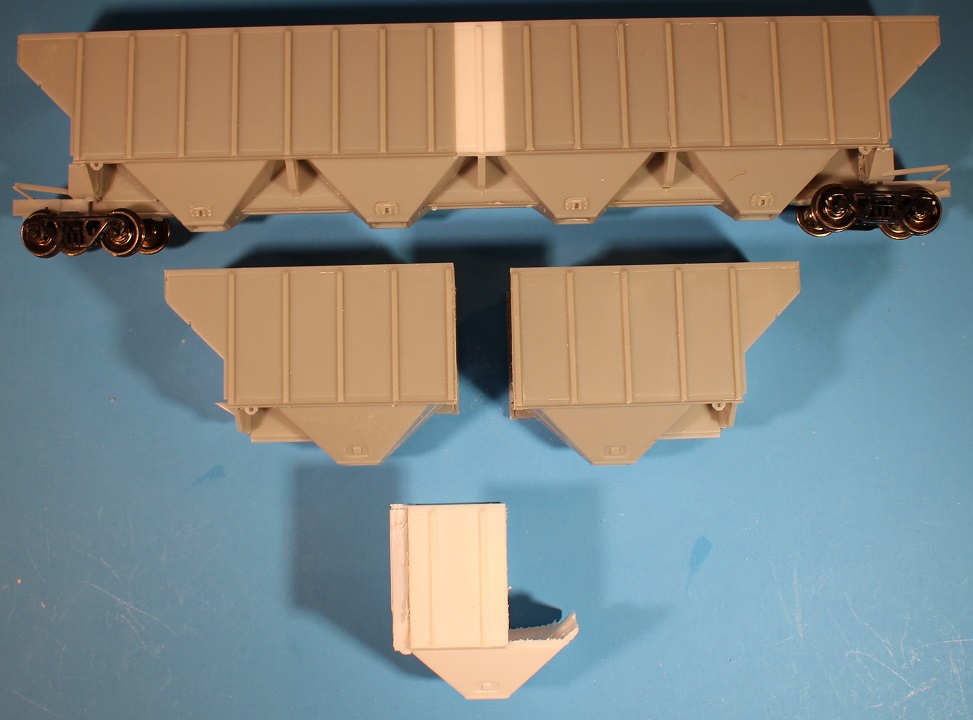
This was not a car that I ever thought I would be building. Didn't really know they existed. Kind of stumbled into the car and the project. I was planning how to go about cutting down a Proto2000 PS2 4427 to make one of the CNW PS2 3148 2 bay cars. Yeah, I could just cut the center bay out and have what I needed. But I like to look for ways to use as much of the cars as I can and not waste anything. While looking to see how I could use this 'extra bay' I discovered the UP had 4 bay cars that were similarly configured. These 5250cf 4 bay cars have rib spacing almost like the 4427 cf cars. Sure, the fourth panel in is smaller, but these larger rib spacing's over the end bays is closer than those of the 4740 cf cars. So after a loooong planning (procrastinating) period I figured out a way to use four car bodies to build four complete cars and be left with very little scrap. I know the rib spacing will not be completely correct, but they will be close enough for me. Could actually be three cars but had the parts for four. Couldn't do just two due to side wall fill in. I will attempt to explain all of this as I go through the build.
As I start, I'm not planning any special features. Just splice it together add the roof and build the rest of the 'kit'. Let see how it goes.
| How to photos | How to description |
|---|---|

|
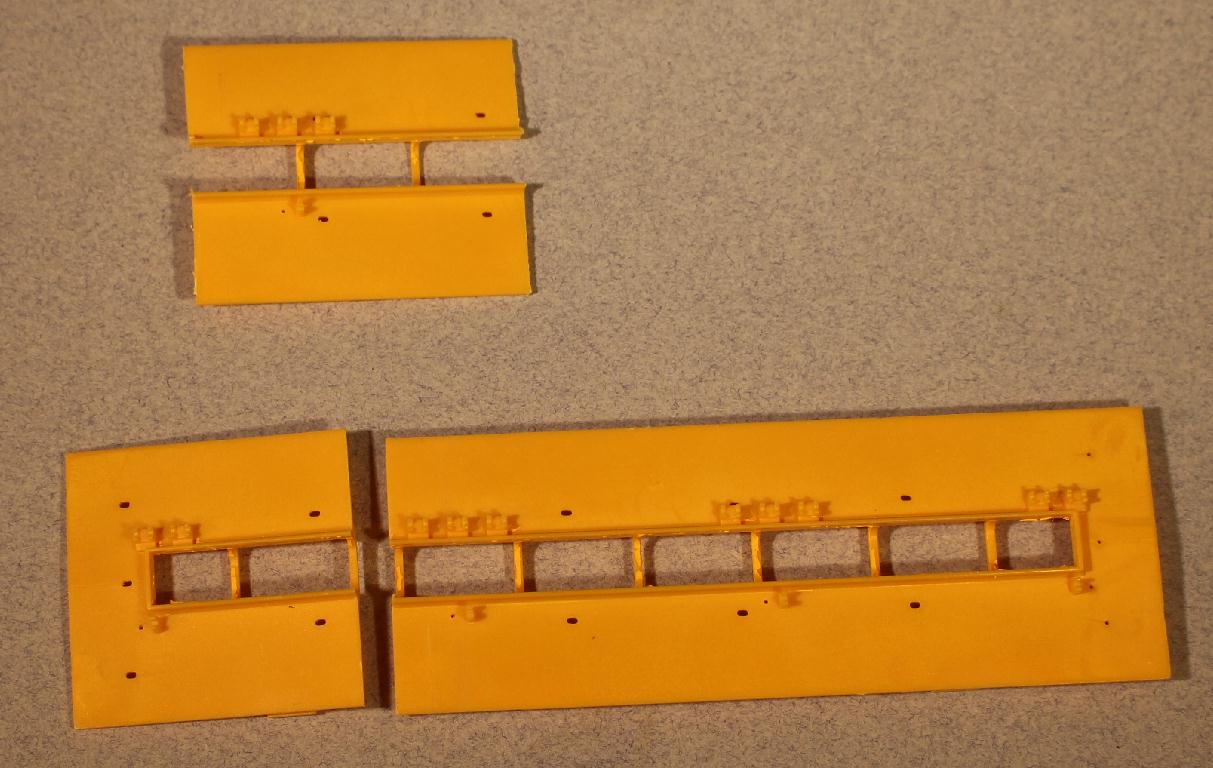
In this first photo you can see two 'left over' ends of two P2K ps2cd 4427 models. This 4 bay car will use two A end bays and two B end bays. The single A and B end bays are being used to build a CNW 3148cf two bay car. That is why I called them 'left over'. |
|
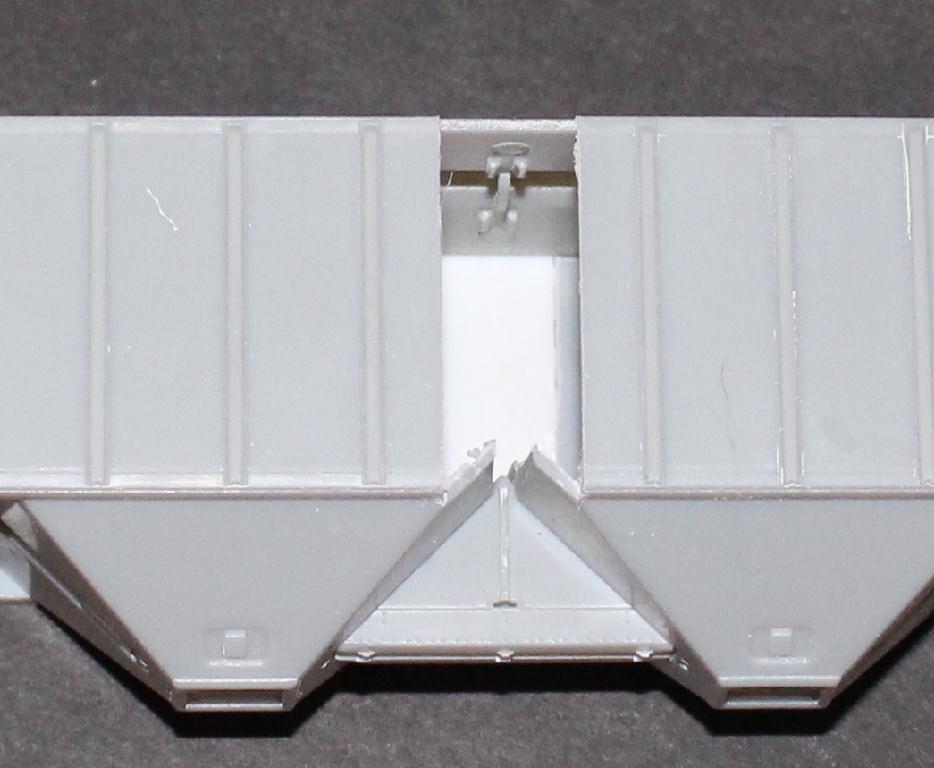
Here you can see I have started to put the two ends together. The bay divider walls were left on the single bay ends so they are not present. A half section of each 'panel' between the ribs has been removed. I say half but when I cut it I offset the cut the width of the saw blade. To make sure I keep everything square I installed a 4427 roof (not glued) in place. Two of the bay supports/braces were installed and glued in placed. Pieces of styrene were glued to the inside wall to keep in straight and square. |
|
The reason the panel was cut down the center was so new panels could be added that are the same width of the original panels, with a post. Did they have to be? Probably not. But There is a better chance of me getting the post of the new panel centered. Where did that 'extra' white panel come from? That is the reason of needing at least three shells. One body was cut twice for the two end and the remaining center bay walls will be used to make the filler sections. |
|
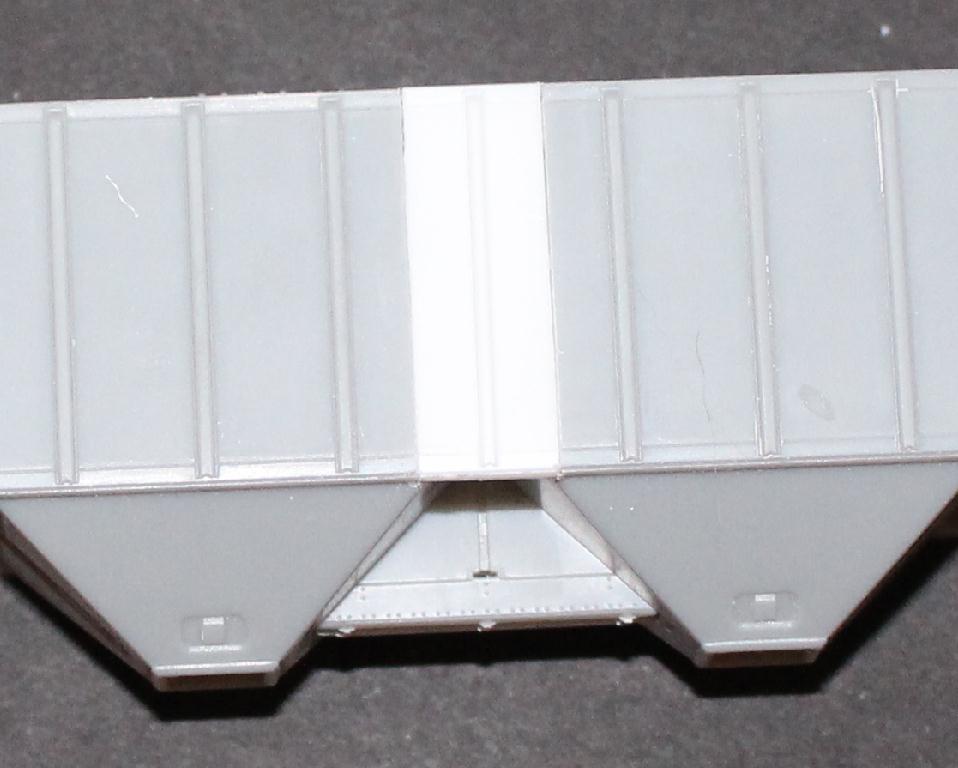
I took a quick photo showing the car assembled, the single bays being used for the 3148cf car and the donor center bay. As you can see I sliced off a section of the wall the width of the needed panel. My original thinking was I could get four (2 left-2 right) panels per donor bay. But theoretically, with very careful planning, six panels could be made. Four could be the full width and two would be narrower. Which means the shells using those two would need to be trimmed about 2X the width of the saw blade. Just getting that out before someone calls me out on it... |
|
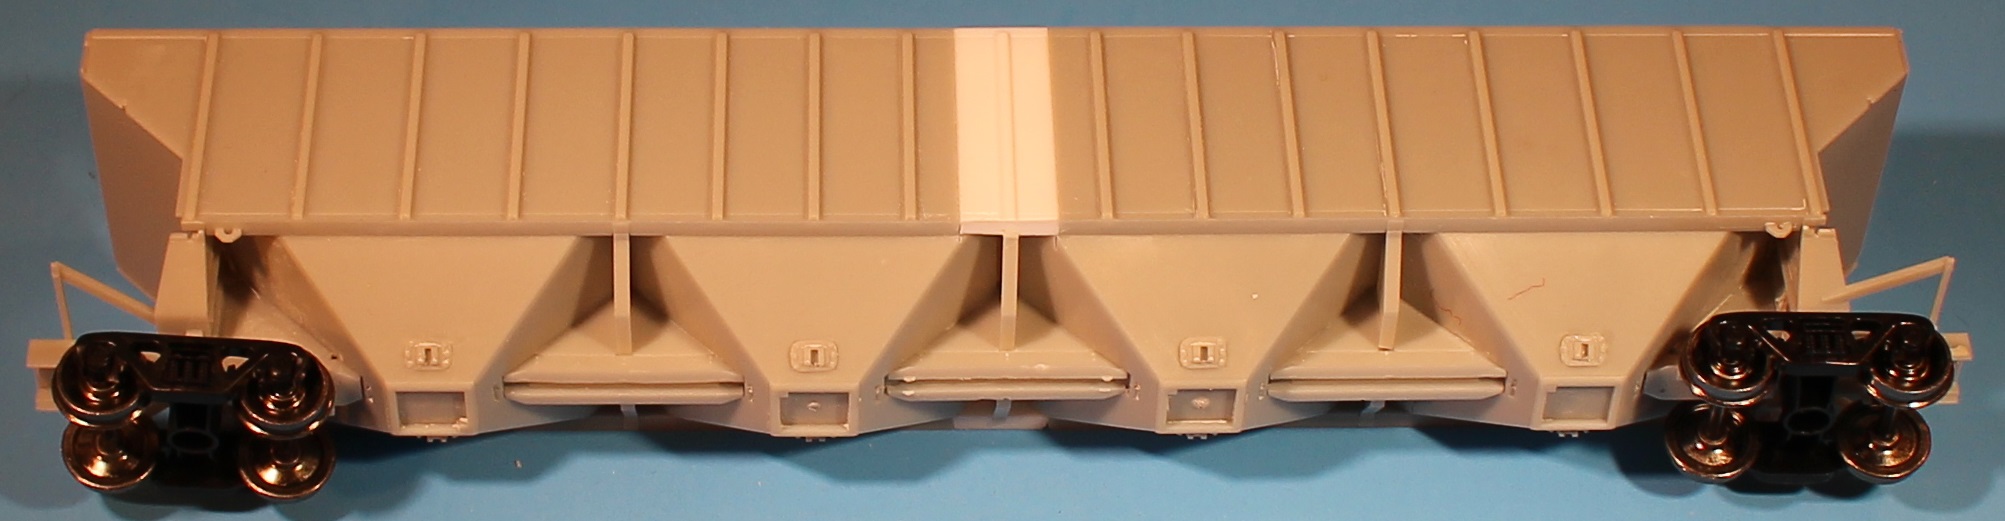
Here is another photo of bottom of the car with the braces and supports added between the bays. And the bolsters added to the ends. Once the car is together, MOST of the rest of the build, like the ends, will be built per the P2K instructions. And yes, I will be using some filler to smooth the seams of the splices. |
|
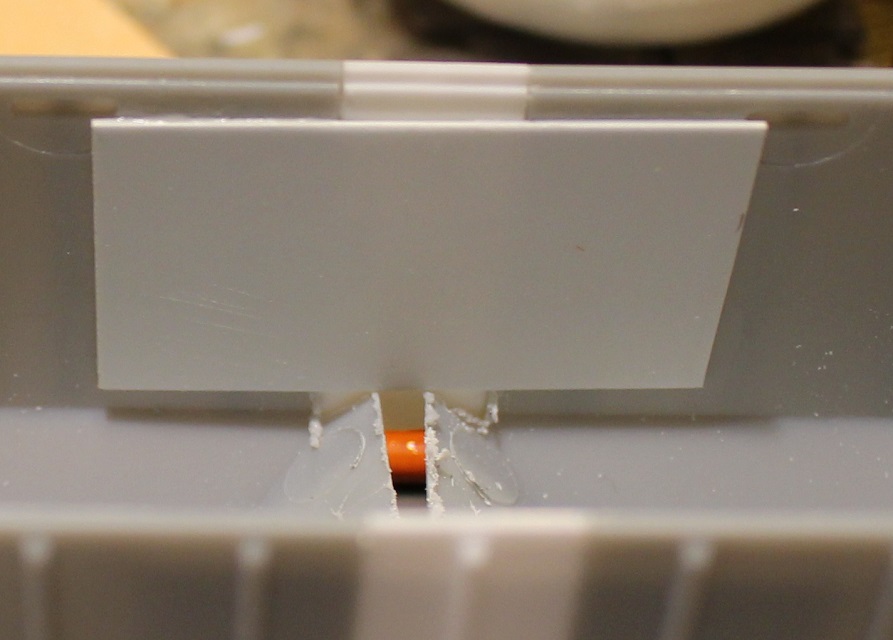
Another quick photo, this one showing the inside of the car with a piece of styrene glued to the inside wall. This too may not be needed. But if you think about it, where and how do you pick up a model? And once this car is properly weighted, could those new panels 'pop' loose over time? So, a little extra backing won't hurt any. |
|
Moving to the roof. Somewhat like the 3148cf car I am working on, my first thought was to slice a couple of roofs together to get the correct length. But that was going to be tricky because this car has four hatch panels that are a different length the 4427 hatch panels. That meant that all the hinge and latch posts would need to be relocated. And more splice lines to fill and sand. |

|
Not sure this is going to be any easier, but now I am thinking about fabricating a whole new roof. I will have to create the new hatch rim (no opening) and new hatch, something like I did on one of my 4427cf cars. But here I will have to make or transplant the hinge and latch posts. Still procrastinating that one. Here I have positions a .030" styrene roof on the car. The original roof is .050" thick so I will need to add a .020" lip along the edges to get it even with the car side. |

|
This project is on hold while I look at a few options. While digging around in my 'stash of supply materials' (not what the wife calls it) I found some .050" sheet styrene. Hopefully this will work better for the new roof. Will update soon. |
|
|
next |
If you are interested in seeing the other models I am working on or planning to work on, >click here<
Have a comment, question, suggestion, info about this model project? Let me know - email

www.planomodelproducts.com